Sign Up & Get Upto Rs. 1,500 off on Your First Purchase!

7 Exquisite Makar Sankranti Decoration Ideas at Home 2023
06 Jan 2023

Kites overcast the sky, and you can feel the chill in the weather while the sweet smell of til beckons you home—Makar Sankranti is here. Or is it Pongal, Lohri, or Uttarayana? Whatever you call it, the festival of kites and harvest is here, and so are we with our Sankranti decoration ideas at home because this joyous festival needs to be celebrated in style.
7 Delightful Sankranti Home Decoration Ideas
With each Indian state set to welcome Makar Sankranti with its own rituals and food, it makes ardent sense to deck up your home in colours, flower decoration, and decorations that celebrate the Sun deity and nature’s bounty in full measure.
While to some, a festival is an occasion to pep up their home with new statement pieces and whitewashing; others would prefer a simpler Sankranti decoration at home. So, how can you change up things around your home that deliver all the celebratory feels without compromising on your home’s design theme?
Read on for some choicest Sankranti decoration ideas at home that will serve as the perfect background for your Instagram reels while blasting away Patang Uda Re Chora.
Udi Udi Na Jaye Patang (Kite)

Not all kites are meant to be flown—yes, even on Makar Sankranti, the festival of kite flying. Instead, some of them become ingrained in your Makar Sankranti decoration at home. From house walls to front doors to stair railings—pick any spot, and you can easily hang kites to give your home a festive flair. You can even go up the notch by involving kids in building a kite toran.
Feeling more adventurous? Incorporate attention-grabbing traditional wallpapers or murals that are representative of the village life and spirit.
Rangeen Rangoli For Makar Sankranti Home Decoration

Rangolis were, are, and will continue to be a staple Makar Sankranti home decoration idea or any festival for that matter. They just are a beautiful and colourful way of adding new flavours to your home entrance or the puja room.
Go natural by using flower petals, pulses, and colourful leaves to draw up out-of-box designs and compost these elements post-celebrations. Feel free to go down the elaborate route by adding pots and sugarcane symbols to your rangoli/Kolam to outmatch your neighbours. After all, not all battles are fought in the sky with kites.
A Sugary Sankranti Spin
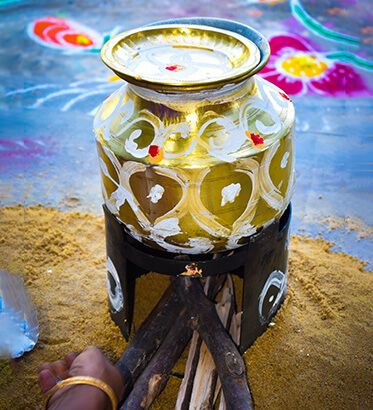
Makar Sankranti signifies meals loaded with sesame, rice, and jaggery. But why stop there? How about adding sugary elements as part of your Makar Sankranti decoration at home? Line your dining room with clay pots of boiled rice and milk, or go completely rustic by hanging sugarcane sticks and leaves between the pots while singing Gud Naal Ishq Mitha.
Dine in Sankranti Style
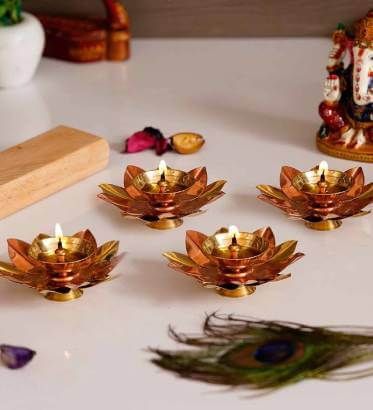
Imagine spending hours cooking some of the best Sankranti delicacies that could beat Radisson’s food festivals and not even decking up the dining table to usher in the festive spirit. Meh!
Hoard and display earthy-hued ceramic or terracotta plates, or go traditional with banana leaves for serving sweets as part of your Sankranti decoration ideas at home. Put in some diyas or teak-smelling candle holders to fire up your dining space. Use runners with traditional motifs on your dining table and add some luxurious touches with exotic flower vases.
Light Up for a Bright Sankranti

We know what you’re thinking. Light up when we have already planned for a bonfire night? Well, why not? What screams bright and festive more than string lights sprung across your balcony? Ok, maybe kites do, but we can’t fly them at night. However, what we can fly are paper lanterns—write your wishes for the new year and give them wings.
Feeling creative? Experiment with some DIY lanterns that use glass bottles or seashell lights as part of your Makar Sankranti home decoration. Or go all out, and add a Jhumar Light to your home decor.
Farm Animal Figurines for Sankranti Decoration at Home

Let’s be honest; there would be no Makar Sankranti if there were no farm animals toiling away with the farmers in the fields. So, a creative Makar Sankranti decoration idea at home is to add tiny figurines of farm animals, such as cows, that are deeply revered during this festival. Or you could also hang wood-painted cow heads on your walls. They will even add a traditional touch to your home décor all year long.
Feel the Aroma
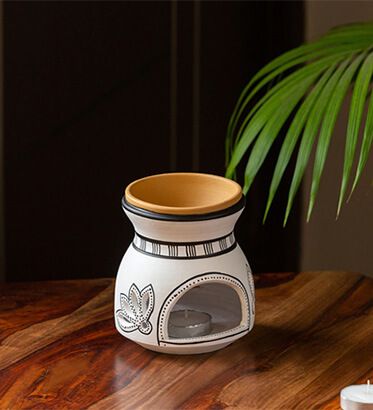
Round off your Makar Sankranti home decoration with home fragrances that blend in perfectly with your bonfire and home interiors. They are sure to add a vibrant touch to your celebrations while you serenade your loved ones to the tunes of Kesariya and Ambarsariya.
Transform Your Home This Makar Sankranti with Pepperfry
Add another dimension to Sankranti’s adage of ‘Til Gul ghya, God Bola’ (have sweets and talk sweet) by decking up your home with our choicest Sankranti decoration ideas at home to celebrate this festival with grace and poise. Or better yet, turn this festival into an excuse to overhaul your home’s look by thumbing through Pepperfry’s ever-expanding and trendy collection of home furnishings.
Show more blogs from :
Bonhomie
Recommended For You
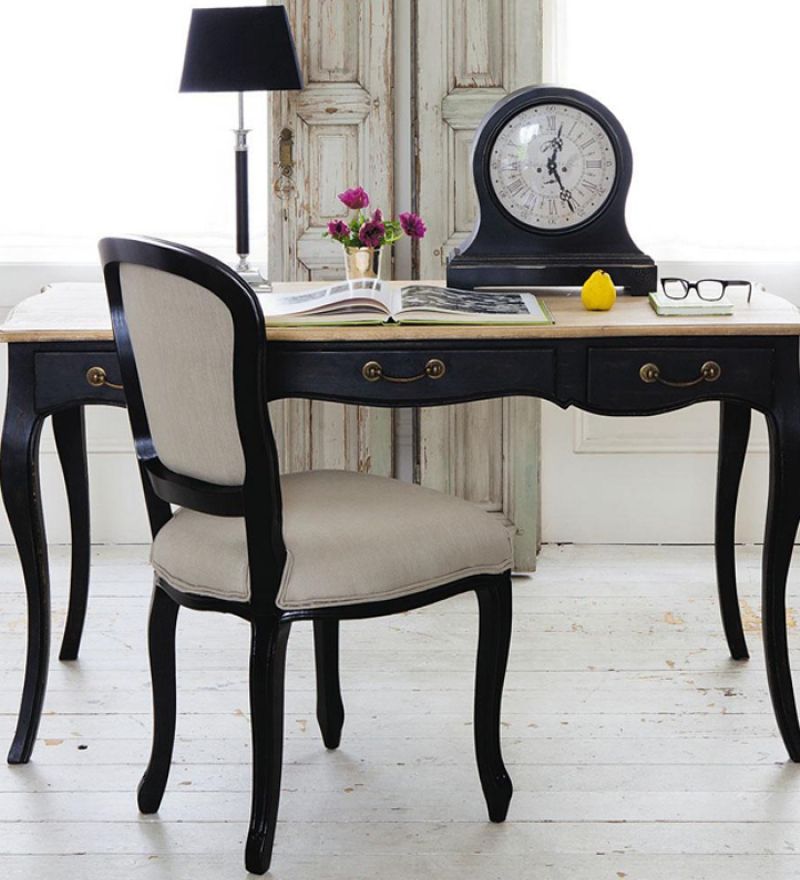
Expert Iron Furniture Cleaning Tips & Tricks

Wrought iron furniture look great and even though believed otherwise, is quite easy to clean and maintain.
Wrought Iron furniture looks great, we know. Ask any home décor enthusiast that he / she will agree that wrought iron furniture gives a certain personality to a home. But even though look pretty, due to its extra hard texture, wrought iron tends to gather more than necessary dust and grime. But if you are a wrought iron furniture enthusiast and thinking of buying furniture for indoor or outdoor, then you should know that cleaning of such items can be done without hassle and with just a few materials.
Important Tip: To begin with, you will need Soap or Vinegar, Warm water, Sponge, Clean and dry cloth, Bucket.
Now follow these instructions in an orderly fashion.
1. Fill a bucket with warm water.
2. Add a mild soap such as dish washing liquid or household cleaner. If you are scrubbing wrought iron that is kept inside, vinegar is your best option.
3. Mix soap with water. The ration should be 1 tbsp. (5 ml) of soap to 1 qt. (946 ml) of water. For vinegar, use 1/2 cup (118 ml) to 1/2 gallon (1892 ml) of water.
4. Empty the wrought iron furniture of any cushions, pillows, blankets etc.
5. Soak a sponge or wash cloth in the water if you are using a bucket.
6. Smear the wrought iron in a rounded motion, cleaning section by section and ensuring that all the diet and grime is gone.
7. If you find rust on the furniture, use a wire brush or course sandpaper to scrub.
8. Refill the bucket with clean water for a second round.
9. Rinse the cloth you have been cleaning with.
10. Wipe down the wrought iron again with the clean water, making sure to rinse the sponge or cloth frequently. If you are washing wrought iron outdoors, it may be easier to rinse with a water hose.
11. Let the furniture to dry thoroughly. Outdoor furniture can be left in the sun whereas indoor items should be wipes with a clean and dry cloth.
20 Jan 2026
Bonhomie
Expert Guide: How to Clean Old & Vintage Furniture
If you have antique furniture that you would like to keep for yourself in the best possible condition these are the steps you can take to keep it clean and well cared for.
Valuable antique or vintage furniture will have a layer of grime on its surface from years of exposure to dust, dirt and fumes. Collectors and buyers of good antique furniture look for this layer of grime, which is referred to as the antique’s “patina.” If you are looking to sell the piece, it is best not to try to clean it yourself without first consulting a professional antique restorer.
Step 1
Remove the old wax from your antique furniture first because a cleaner of any kind will not penetrate a surface that has a build-up of old wax. There are varieties of name-brand cleaners and/or strippers that you can purchase at a hardware store to do this. Or you can use paint thinner at home in a well-ventilated room, wearing protective gloves and a face mask.
Step 2
Pour a small amount of the paint thinner into a glass bowl, then with a superfine (0000) pad of steel wool, gently rub in slow circular motions across the surface of the antique, being careful not to rub so hard that you scratch the wood. Eventually the old wax build-up will loosen and begin to re-liquefy and you can then gently rub it off with a soft cloth. Continue this step until you’re sure there is no more old wax on the surface.
Step 3
Mix a little mild dish-washing liquid in warm water. Now, using a soft cloth, gently wipe away the residue of the old wax and the cleaner from one small area of the antique at a time. Do not soak the wood, nor let water pool on its surface. Continue to wipe off the entire surface with your damp cloth until you are sure the wax build-up and residue is gone.
Step 4
Reapply a wax to your newly cleaned antique after you complete the touch-ups. The new wax will protect the new clean surface, unlike oily furniture spray polish, which may provide a shine but do nothing to protect the furniture.
Important Tip: When using any harsh chemicals like paint thinner, do it in a well-ventilated room, wearing protective gloves and a face mask. Check our guide to buy antique furniture online.
Data Credit: www. wikihow.com
20 Jan 2026
Bonhomie
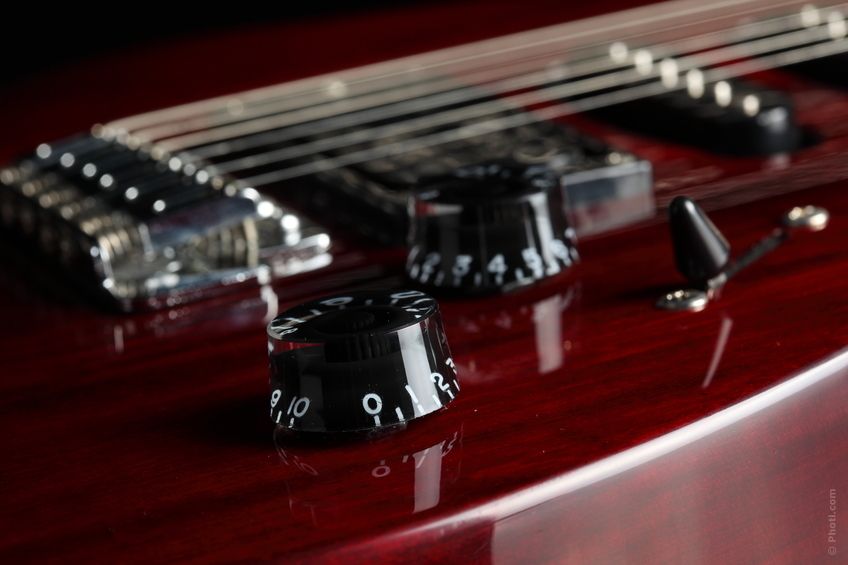
Expert Guide: How to Clean Musical Instruments
A COA (Cleaning, Oiling, Adjusting) is important for any instrument, though the term is usually used when talking about woodwind instruments.
A COA once or twice a year is ideal, but if you can’t afford that, or don’t find it necessary, you’ll still need to have your instrument fixed up when things start to go wrong.
It’s best to catch these things early on, but the less obvious results of wear and tear can be easily overlooked, unless you know what you’re looking for. While this article mainly focuses on woodwinds, the concept can also be applied to brass instruments.
Take care of your instrument. While this should be obvious, it’s good to be in the habit of being careful. Don’t drop it, use the case as a footrest, hold it in a way that can damage the keys, skip swabbing it, etc. Taking care of your instrument can save you a lot of time at the repair shop and a good bit of money.
Maintaining the musical instrument is as important as buying it.
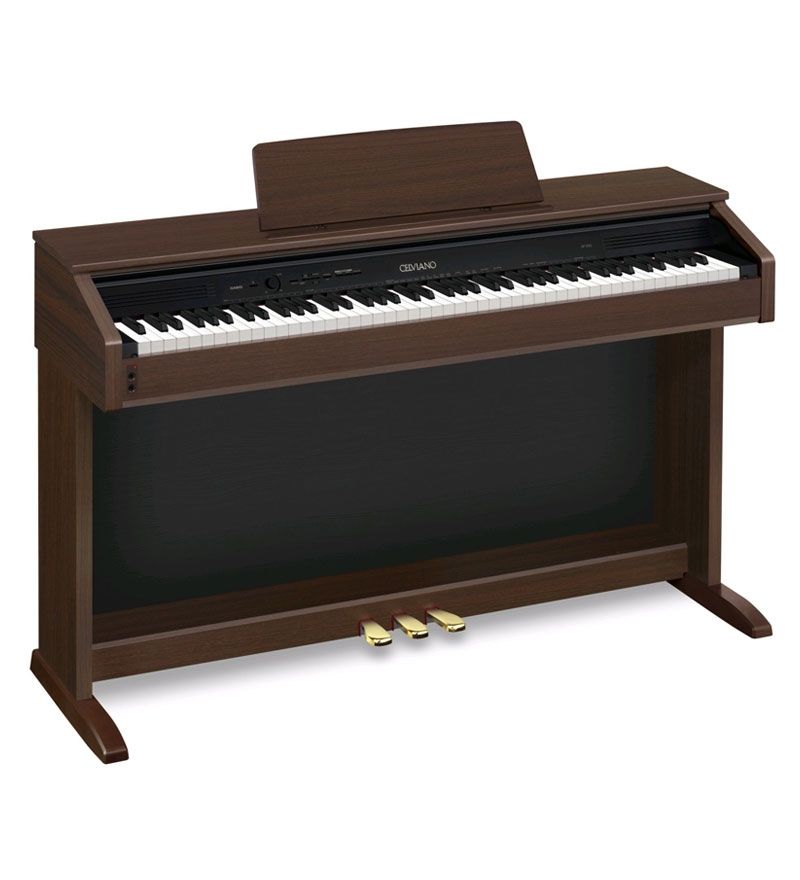
Image: Casio Digital Piano AP-250 BK/BN
Pay attention to your instrument when you are playing it. If you are alert and familiar with your instrument, you should notice almost immediately when something isn’t working right. However, there are some things that you may not notice when playing, so every so often, sit down and take a really good look at your instrument.
Get an idea of your instrument’s general outside appearance. The “C” part of COA covers both cleaning the inside and cleaning the outside. While the outside appearance of your instrument doesn’t really affect your playing, most musicians want to keep their instruments looking nice, and if you try to sell it in the future, you’ll be glad that you kept up its appearance.
Take a look at the color and condition of the pads. Color doesn’t always affect playing ability, but if the pads are cracked, swollen, or growing mold, it might be time to replace them. It may be that only some of the pads are in bad condition, in which case you can just get your instrument partially re-padded.

A COA is highly recommended before any major competition or assessment, Solo and Ensemble event, audition, or big concert.
Image Credit: Yamaha SLG-110S H Silent Guitar
Check for leaks. For most woodwinds, this can be done by taking each individual section of your instrument, covering all the holes with one hand, covering one end of the section with the palm of the other, and blowing into the open end. You should not feel or hear any air escaping.
Make sure your corks are in good condition. No section of the cork should be missing, spit shouldn’t leak out between the sections, and the instrument should not fall apart or wiggle where the sections meet. If you are experiencing any of these problems, get your instrument re-corked, or at least fix the cork(s) that are giving you trouble.
Decide if there’s anything you want adjusted, even if it’s not really something “wrong” with the instrument. You may decide that it would be easier to play certain notes if a certain key was tightened or loosened slightly, you want your keys silver-plated instead of nickel-plated (since you’ve already decided to have it re-keyed), or things of that nature.
Take your instrument (and mental/written list of things to be done) down to the music store, and ask for a COA. Ask how much it’ll cost, and when you can pick your instrument up. If not much is wrong, you may be able to walk out with in in a matter of minutes, or an hour or so. If it’s having anything major replaced (corks, keys, pads, etc.), you may be looking at a few days to a week.
Check out our collection of musical instruments by clicking here
20 Jan 2026
Bonhomie
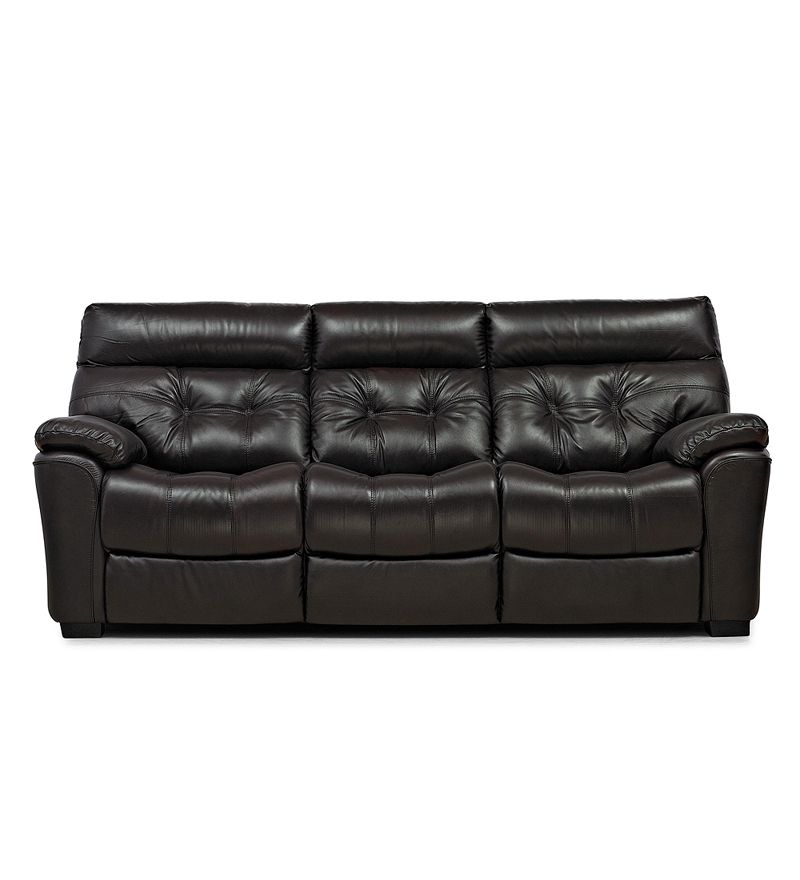
Leather Furniture Cleaning Tips & Clever Hacks
Taking care of your leather sofa the right way will ensure that it lasts for years.
Leather furniture, while quite beautiful and elegant, can be a challenge to maintain. It can be easily damaged by improper cleaning techniques.
Before You Begin:
- Before you attempt to clean your leather furniture, it is important to determine the type of leather you’re working with. You can typically find this information on the tags attached to your furniture or in the written material distributed with your furniture. You can also contact your furniture retailer or manufacturer.
- The tags and other written information generally provide tips on cleaning your particular furniture. It is recommended that before attempting any of the suggestions offered in this article that you follow the cleaning procedures recommended by the manufacturer of your particular furniture.
- When you purchased your furniture your retailer may have supplied you with leather care products which may be more appropriate for your furniture than the cleaning solutions suggested here.
What You Will Need
- Vacuum cleaner with soft brush attachment
- Mild liquid facial or body soap (such as Dove or Neutrogena)
- Distilled water*
- buckets
- At least four soft rags
- Water-based leather protector/conditioner (found in most furniture stores)
*It is best to use distilled water because tap water may contain chlorine and other contaminants which can damage the surface of the leather.
Cleaning Instructions
- Vacuum the piece of furniture thoroughly, being sure to use the soft brush attachment (leather scratches easily). If the suction on your vacuum is too strong, consider using a smaller hand held vacuum with less power to prevent leaving marks on the leather.
- Mix a few drops of liquid soap with about a quart of distilled water, mixing until suds form.
- Test a small, inconspicuous area of the furniture first.
- Dip one of the rags in the soapy water and wring out thoroughly.
- Working one section at a time, wipe the surface of the furniture with the damp rag.
- Dip a separate rag in clean distilled water (no soap), wring thoroughly, and wipe away the soap residue.
- Dry thoroughly with the third rag.
- Buff the surface with the fourth clean rag to restore luster.
- Treat the surface with leather protector/conditioner as per product instructions.
Leather Furniture Stain Removal
Remember to ALWAYS test a small, inconspicuous area of the furniture first before using any of these methods.
Ink stains: Dip a cotton swab in rubbing (Isoprophl) alcohol and rub over the ink stain. Dry with a blow dryer set on its lowest setting.
Dark stains: (i.e. food, blood, etc.): Make a paste of one part cream of tartar with 1 part lemon juice. Rub this paste on the stain and leave it set for 10 minutes. Remove the paste with a damp rag and moisturizing soap, as described above for general cleaning. Buff the leather dry with a soft cloth.
Grease stains: Simply wipe stain from the leather using a dry cloth. Do not apply water to the grease stain.
20 Jan 2026
Bonhomie
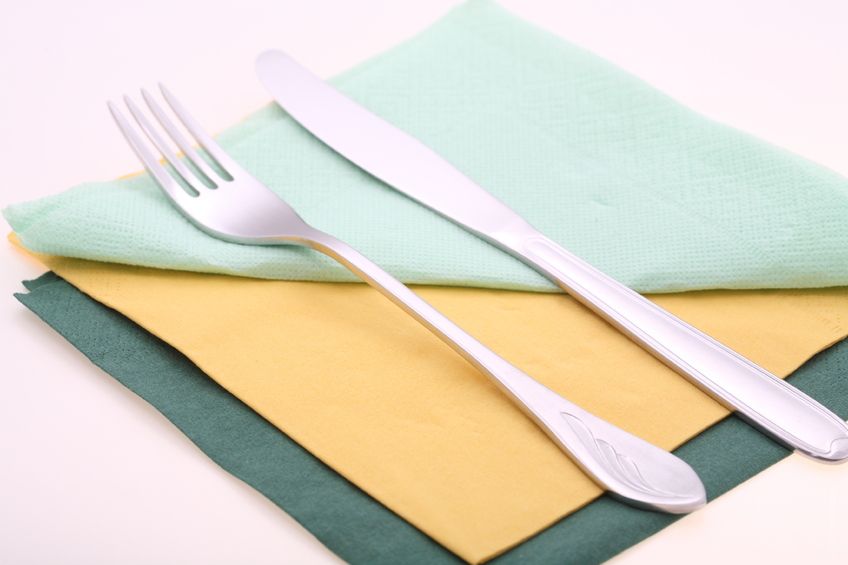
Easy Guide: How to Clean Cutlery & Keep It Shiny
Thinking of cleaning your cutlery? Then we have some ideas for you.
If you like throwing dinner parties or like to eat with your fancy spoons and forks every day, it’s important that you keep your cutlery sets spotless. Easier said than done because after a while cutlery lose their sparkle and add above that a greasy diet, fingerprint and reside water droplets. Result is your fancy cutlery ends up looking dull and lifeless.
So what should you do to keep your cutlery shiny and clean? Simply follow the below mentioned tips.
Use Vinegar
- Immerse your cutlery with white vinegar and hot water (1:8) for about 8-10 minutes, rinse it with warm water.
- Clean and buff your cutlery methodically with a lint-free or microfibre cloth to remove the water streaks
Use Bicarbonate Soda
- Fill warm water in a tray.
- Add a teaspoon of bicarbonate soda, and combine it with warm water.
- Drop your entire cutlery into the tray for 10-15 minutes.
- Clean your cutlery with warm water.
- Clean and buff with a lint-free or microfibre cloth.
Remember
- Never use steel wool to scrub stains from your stainless steel cutlery as it will damage the surface of the cutlery.
- Do not use rough or damaging cleansers containing chlorine bleach. Also, always abstain from exhausting alcohol or oven cleaners as cleaning agents for your stainless steel cutlery.
- Do not allow your cutlery to overheat. For instance, do not leave it on a hot stove burner or use it to stir a boiling pot of food.
- Use extra caution when cleaning silver-plated stainless steel cutlery. Silver plating causes different interactions with detergents and can cause permanent damage to the cutlery’s finish.
Looking to invest in a cutlery set? Check out our range here.
20 Jan 2026
Bonhomie
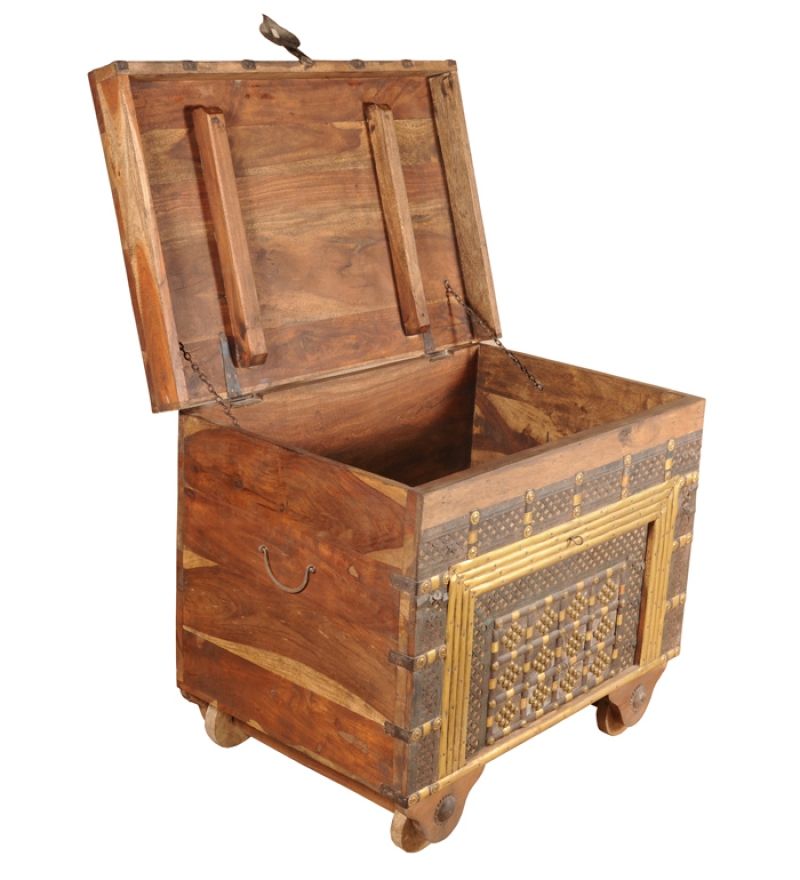
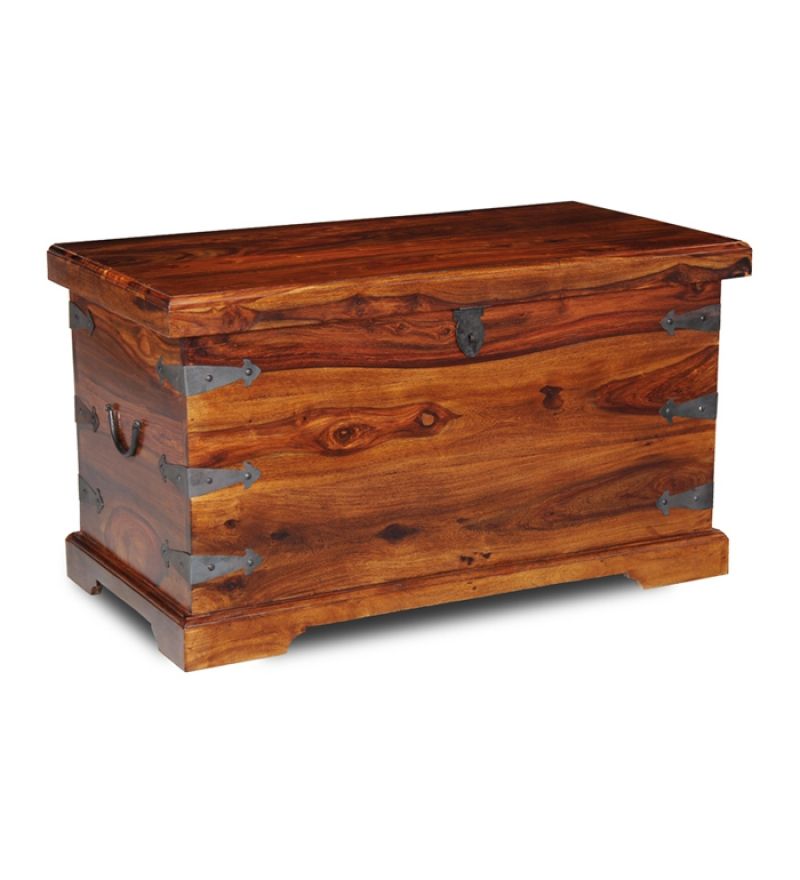
Step‑by‑Step Guide to Clean a Wooden Box & Chest
Cleaning this Sheesham Wood Brass Fitted chest might look tricky but our tips will help you breeze through the process
A wooden chest, also known as a hope chest is usually made from cedar wood. The traditional hope chest is a wooden trunk or box that is used to store special articles of clothing and other household goods for a bride to use after her marriage. The interesting trivia is that the hope chest is thought to have progressed out of requirement. In medieval Europe, many marriages we arranged by parents in order to merge family fortunes.
Coming back to the modem day and age, If one takes good care of hope chests, it can last for generations and one way to ensure that it does is by proper cleaning. Taking care of a wooden chest is very much like taking care of any other wooden furnishings. Keep the wooden away from water and only use products meant for wooden items only.
6 Ways to Clean a Wooden Chest
Step 1
Firstly, remove all the items stored in the chest and place is somewhere safe. Then take cloth and place the chest on top of the cloth. Wondering why? Simply because the cloth will protect your floor from all the dust and other products which will be used in the cleaning process of the chest.
Step 2
Start the vacuum cleaner and vacuum the inside of the chest carefully.
The traditional hope chest is a wooden trunk or box that is used to store special articles of clothing and other household goods for a bride to use after her marriage.
Step 3
Now take a piece of cloth and carefully wipe the chest clean. You can do this by dampening a lint free dusting cloth or any other cloth. Make sure to clean the interiors of the lid as well. Make sure you don’t dampen the cloth too much as too much wetness is not good for wooden items.
Step 4
Once you are done with the cleaning, let the chest dry by keeping the lid open. Once you have repeated the process on the exterior of the chest as well, then it’s time to apply the furniture polish. The best way to do this is by spraying the cloth with the spray and wiping it on the chests exterior.
Step 5
It’s time to polish the wood. Take a piece of clean cloth and smear a tiny amount of wood polish to the insides of the chest. If the chest is made of cedar wood, then you can use little cedar oil.
Step 6
The last step is cleaning the hardware. Make sure you clean the metal hinges with a soft cloth, gently.
20 Jan 2026
Bonhomie