Sign Up & Get Upto 1,500 off on Your First Purchase!


Office Design Ideas for Remarkable Workspaces
21 Jan 2026

It isn’t hard to make a truly remarkable office.
A truly remarkable office design is much harder to achieve than you might have originally thought. This is a space that needs to be much more than a place where your employees come each day – it is a place where ideas are born, nurtured and implemented to perfection. The design needs to encourage your employees to come to work each day and work to the best of their abilities. To achieve this, your office needs each of these cornerstones:
- Functionality
The first cornerstone that you should focus on is the functionality of your office design. This includes day to day functionality, which is the elements that are essential to your employee’s working lives, and proactive functionality, which goes deeper and creates an environment that cuts down on stresses. Splitting your workplace up in this way can help to ensure that every element is covered. - Motivation
To encourage your employees to come to work, your design needs to be motivational. This can be achieved in a variety of ways – offices around the world experiment with colour, furniture and other decorative elements to see what effects are had. In terms of colour, red is known to quicken the heart rate whilst blue lowers blood pressure. In terms of furniture, it should be as comfortable as possible. - Good Looks
Whilst a good looking office can’t be only good looking if you want it to be effective, it does help. It can help with the motivation of your employees but, most importantly, it can have a dramatic impact on the way that your clients perceive you. Research has suggested that the best looking workplaces are the most successful ones. The design clearly outlines what the business is about and clients get this. - Comfort
Making both employees and clients feel at ease in the office is absolutely crucial to your design. After all, employees who feel on edge and clients who can’t relax during meetings aren’t going to yield the best possible results for your business. Ergonomic furniture is key here, as it will avoid aches, pains and fidgeting. This will also go a long way towards fostering the health of your employees. - Accessibility
This category doesn’t just refer to disabled or delivery access – it actually refers to the layout of your whole office design. This is especially important for larger workplaces with bigger workforce, as the layout needs to be easily navigable and avoid congestion. On a smaller scale, the layout of your employee’s desks is also important – they shouldn’t be placed nearby to toilets or noisy spots.

All you need is a few guidelines to make your workplace truly remarkable
Whilst it can be difficult to unintentionally make a few mistakes in your office design, it is important to note that it isn’t overly hard to make a truly remarkable one either. All you need to do is familiarise yourself with the cornerstones we have outlined above and ensure that they are incorporated into your workplace in whatever way possible. It can also be extremely beneficial to have a professional design team work on your project.
Show more blogs from :
Bonhomie
Recommended For You
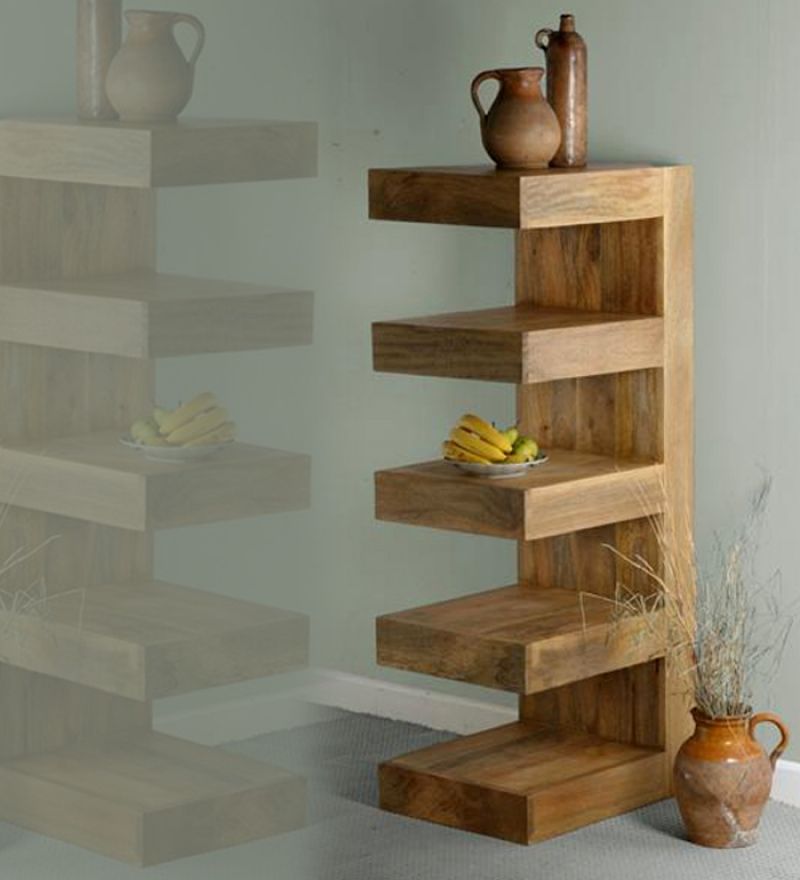
How to Make Furniture Polish at Home Using Olive Oil
Your wooden furniture deserves care that does not come with a list of unpronounceable chemicals. Learning how to make furniture polish at home takes about five minutes and requires just three items already sitting in your kitchen. Olive oil, white vinegar, and lemon form the foundation of a polish that cleans, nourishes, and protects wood surfaces.
This article covers everything you need to know about how to make wood polish at home. You will find exact measurements, mixing tips, application techniques, and storage advice that keep your formula fresh for months.
Expert Quote: "Homemade polish is a great way to remove dust, grime and add moisture back into the wooden furniture" - Architectural Digest
Why Choose Homemade Wood Polish Over Store-Bought Options?
Commercial furniture polishes work, but they often contain silicones and petroleum-based ingredients that build up on wood over time. This layer looks shiny at first. After a few months, though, it traps dust and creates a dull film that is surprisingly hard to remove. DIY wood polish sidesteps this problem entirely.
The cost savings add up quickly, too. A bottle of commercial polish costs between Rs 300 and Rs 600 and lasts perhaps two months with regular use. Your homemade batch costs under Rs 100 and delivers the same number of applications.
Three reasons to make the switch:
- Immediate availability: No waiting for deliveries or trips to the store
- Reduced chemical exposure: No synthetic fragrances irritating sensitive noses!
- Lower environmental footprint: No aerosol cans or plastic bottles heading to landfills
This simple swap fits perfectly into sustainable household routines that more families are adopting.
Safety Precautions and Wood Compatibility
Before you gather your ingredients, you need to know how to make homemade furniture polish work safely with your specific pieces. Not every wooden surface responds well to oil-based treatments.
Always test your mixture on a hidden spot first. The underside of a table or the back of a cabinet works well. Wait fifteen minutes and check for darkening, stickiness, or any reaction you did not expect.
Woods and finishes to approach with caution:
- Unsealed pine, which absorbs oil unevenly
- Antique pieces with original water-sensitive finishes
- Waxed furniture that may become cloudy
- Painted wood surfaces
Work in a room with good airflow. If you have citrus allergies, wear gloves when handling the lemon oil. Be mindful that polished floors can become slippery; keep the mixture strictly for furniture surfaces.
Essential Ingredients and Their Functions
Understanding how to make furniture polish at home starts with knowing why each ingredient matters. The classic ratio is three parts oil to one part vinegar, with lemon oil added for fragrance and extra cleaning power.
Olive oil penetrates wood grain rather than sitting on top of it. This feeds the wood, prevents cracking, and restores moisture that air conditioning and dry weather strip away.
You do not need expensive extra-virgin varieties. Regular olive oil from any grocery store works perfectly.
White vinegar cuts through fingerprints, light grime, and the waxy residue left by previous commercial polishes. Its mild acidity breaks down buildup without harming the wood underneath.
Lemon essential oil adds a fresh, clean scent that masks the brief vinegar smell. It also has mild antiseptic properties that help keep surfaces hygienic.
🫒 Olive Oil
- Quantity: ¾ cup
- Primary Function: Nourishes and moisturises the wood grain.
---
🍶 White Vinegar
- Quantity: ¼ cup
- Primary Function: Removes grime and film buildup.
---
🍋 Lemon Essential Oil
- Quantity: 15 drops
- Primary Function: Adds shine and a fresh scent.
Quick Tip: Jojoba oil makes a decent substitute if olive oil is unavailable. However, olive oil offers better shelf stability and costs less.
How to Make Wood Polish at Home: Step-by-Step Instructions
This section walks you through the complete process of creating DIY wood polish that works beautifully on dining tables, bookshelves, and other wooden pieces throughout your home.
Step 1: Measure Your Ingredients Precisely
Pour three-quarters of a cup of olive oil into a glass or ceramic bowl. Ceramic works best because the mixture is mildly acidic. Metal containers can react with the vinegar and alter the formula. Measure your quarter cup of white vinegar and set it aside. Count out fifteen drops of lemon essential oil.
Step 2: Combine in the Correct Order
Add the lemon oil to the olive oil first and stir gently. This prevents the essential oil from evaporating too quickly. Now pour in the vinegar slowly whilst stirring. The liquids will separate naturally; this is normal. You will shake the container before each use to recombine them.
Step 3: Transfer to a Proper Container
Pour your finished polish into a dark glass bottle with a tight-fitting lid. Amber or cobalt glass blocks light and extends shelf life. Label the bottle with the date you made it.
Glass containers preserve freshness far better than plastic, which can leach chemicals into oil-based mixtures over time. A 250ml bottle holds enough polish for two to three full applications across a typical home's wooden furniture.
Did You Know? The entire mixing process takes under five minutes. Many people find it becomes a relaxing monthly ritual, almost like cooking a familiar recipe.
Application Techniques for Best Results
Your polish is ready. Now the technique matters as much as the formula itself.
Pre-Application Preparation
Dust every surface thoroughly before the polish touches the wood. A dry microfibre cloth removes loose particles without scratching. Check that the furniture is completely dry; moisture trapped under oil leads to cloudiness.
If your pieces have accumulated grime, a damp cloth followed by ten minutes of drying time prepares the surface properly.
Buffing Method
Apply polish sparingly. Dip a soft, lint-free cotton cloth into the mixture and wring out the excess. You want the cloth damp, not dripping.
Work in small circular motions, covering a palm-sized area at a time. Once the polish is spread, switch to long strokes that follow the wood grain. This technique prevents streaking and ensures even coverage.
Allow five minutes of drying time before placing decorative items back on the surface. A monthly application schedule keeps wooden furniture looking its best throughout the year. For pieces that receive heavy daily use, consider Pepperfry's furniture care kits as a complementary option.
Storage Guidelines and Shelf-Life Expectations
Proper storage stretches your homemade polish to a six-month lifespan. The key is keeping the mixture away from heat, light, and air exposure.
An amber glass jar with a tight-sealing lid performs best. Store it in a cool, dark cupboard rather than on a windowsill or near the stove. Temperature fluctuations cause the oil to degrade faster.
🗄️ Cool, Dark Cupboard
- Expected Shelf Life: Up to 6 months
- Signs of Spoilage: None
---
🏠 Room Temperature, Indirect Light
- Expected Shelf Life: 3 to 4 months
- Signs of Spoilage: Slight colour change
---
🔥 Near a Heat Source
- Expected Shelf Life: 1 to 2 months
- Signs of Spoilage: Rancid smell and cloudiness
Check your polish before each use. Separation that resolves with shaking is normal. Separation that remains, combined with an off smell or visible colour change, means the batch has spoiled. Making smaller quantities reduces waste and ensures you always work with fresh polish.
Also Read: Step‑by‑Step Guide to Clean a Wooden Box & Chest
Common Application Mistakes and Quick Fixes
Even simple recipes come with learning curves. Here are four common errors and how to fix them immediately.
- Over-polishing creates sticky residue: Wipe the surface with a cloth dampened in equal parts water and vinegar, then buff dry
- Applying unsuitable finishes causes cloudiness: Stop applying immediately and gently buff with a dry cloth; avoid that piece in future
- Skipping the dusting step traps grit: Dust particles mixed with oil act like sandpaper; always dust first, then polish
- Storing in direct sunlight spoils the mixture: Transfer to a dark container and store in a cupboard; discard if a rancid smell develops
Think of these as learning moments rather than failures. DIY wood polish is forgiving, and most mistakes correct themselves with a bit of buffing and patience.
Expert Quote: "Olive oil moisturises, conditions and protects the wood by penetrating into it to form a protective barrier. " - Architectural Digest
Maintain Beautiful Wood Surfaces with Simple, Homemade Solutions
You now know exactly how to make wood polish at home using ingredients you likely already own. Three components, five minutes of mixing, and a consistent monthly routine keep your wooden furniture protected and beautiful.
This approach saves money, reduces your household's chemical load, and puts you in control of how to make furniture polish at home on your own terms. Your dining table, bookshelves, and cherished family pieces will thank you for the gentle, natural care.
Also Read: Home Cleaning Tips and Clever Cleaning Hacks
Frequently Asked Questions (FAQs)
1. Can I use this homemade wood polish on all types of hardwood furniture?
This polish works well on sealed hardwood furniture with oiled or polyurethane finishes. Test on a hidden area first. Avoid using it on unsealed, painted, or waxed wood surfaces.
2. Will the vinegar smell linger after applying the polish?
No. The vinegar scent fades within ten to fifteen minutes as the polish dries. The lemon essential oil leaves a light, pleasant fragrance that most people find refreshing.
3. What cloth material works best for applying and buffing wood polish?
Lint free cotton or microfibre cloths deliver the best results. Old cotton t shirts cut into squares work surprisingly well too. Avoid rough textured fabrics that might scratch.
4. How can I adjust the recipe if I want a stronger cleaning effect?
Increase the vinegar slightly, moving to a 2:1 oil to vinegar ratio. This creates a more powerful cleaning action suitable for furniture with visible grime or film buildup.
5. Does this polish work on laminate or engineered wood surfaces?
Yes, with caution. The vinegar component helps clean laminate effectively. Apply very sparingly and buff immediately to prevent moisture sitting on the surface.
6. What should I do if the polish leaves streaks on my furniture?
Streaking usually means too much polish was applied. Buff the area with a clean, dry cloth using long strokes in the direction of the wood grain until the streaks disappear.
31 Jul 2026
Bonhomie
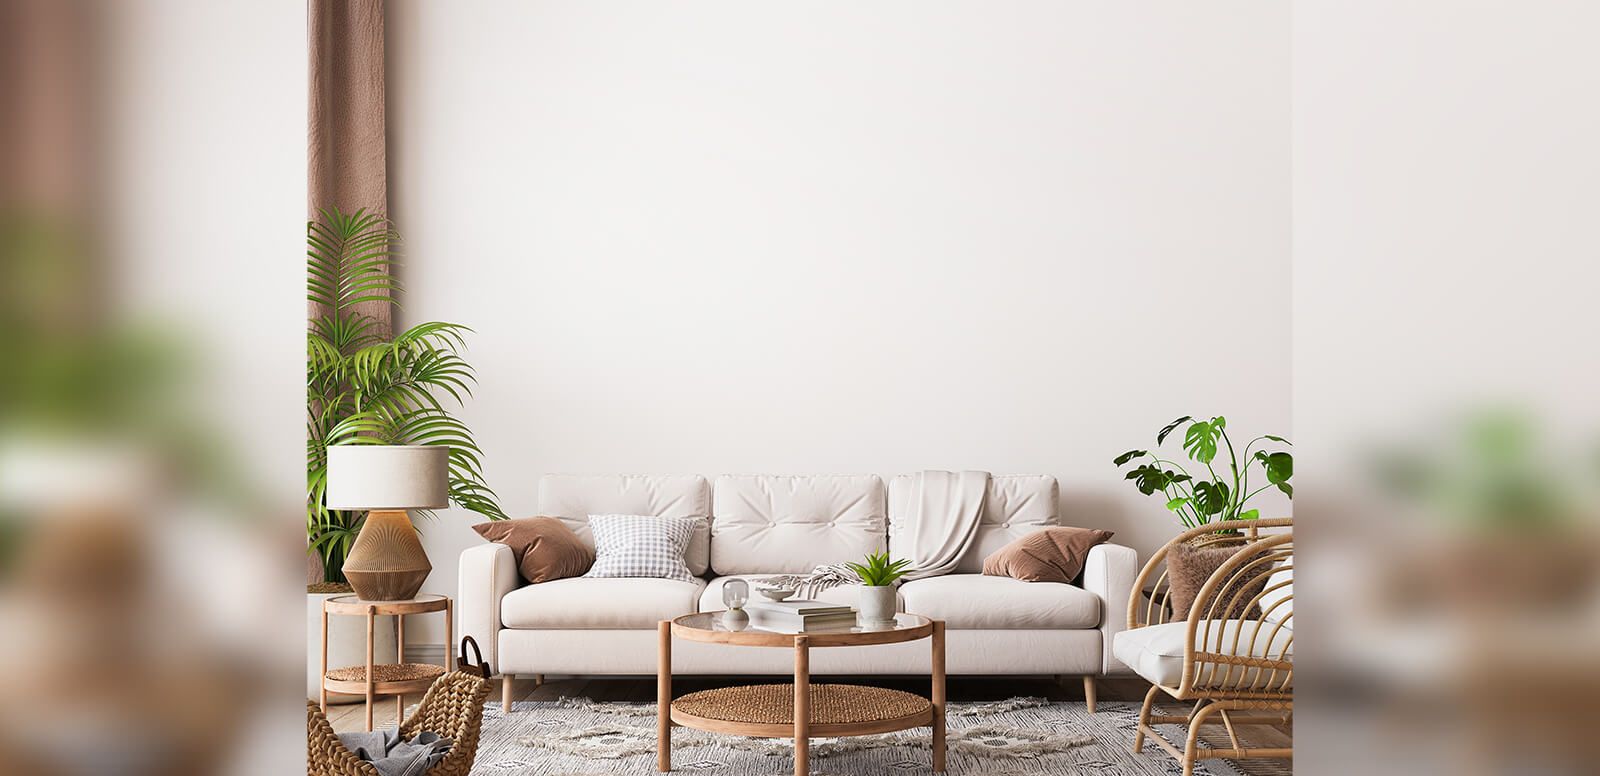
Every Type of Sofa for Your Living Room and How to Choose the Right One
Shopping for a sofa can feel like a maze. You scroll through hundreds of options online, visit showrooms, and somehow end up more confused than when you started. The sheer variety of types of sofa available today makes the choice overwhelming.
Here's the thing: understanding the major categories makes selection much simpler. This guide breaks down different types of sofas by capacity, configuration, style, material, and function. No jargon, no pushy sales talk. Just practical insights to help you find a sofa that fits your room and your life.
Understanding the Major Types of Sofa
Every sofa falls into one or more of five main categories. These are seating capacity, configuration, style, material, and function. Think of these as lenses that help you see what truly matters for your home.
Seating capacity tells you how many people can sit comfortably. Configuration describes the shape and layout. Style defines the visual character and era. Material affects durability, feel, and care needs. Function covers special features like reclining or storage.
Most sofas blend multiple categories. A velvet mid-century two-seater with storage, for example, checks four boxes at once. This is why weighing factors together matters more than fixating on one trait. Your room size, daily habits, and personal taste should guide the final call.
Check-out Sofa Sets Collection at Pepperfry --->
"In an open-plan space, sometimes the best position for the sofa is not on the wall but in the middle of the room. But unless your sofa is quite small, a couch in the middle of a small room can really gobble up space." - Houzz
Types of Sofa Sets by Seating Capacity
Sofas range from single-seater accent chairs to large eight-seater arrangements. The right size depends on your room and how you use it.
Common set combinations and ideal room sizes:
- 3+2+1 set: A three-seater, two-seater, and single chair. Works well in rooms of 200 to 300 square feet with open floor plans.
- 3+1+1 set: A three-seater with two accent chairs. Great for medium rooms around 180 to 250 square feet.
- 2+2 set: Two matching two-seaters. Suits compact spaces under 180 square feet.
- Standalone 3-seater: Perfect for small flats or minimalist setups where one piece suffices.
Before buying, measure your room width and depth. Note doorway clearance too. Many buyers forget this step and face delivery nightmares. A tape measure takes two minutes; returns take two weeks. Compact sets work beautifully in smaller spaces without sacrificing style or comfort.
Also Read: Sofa Buying Guide: Ten Useful Tips to Keep in Mind
Configuration-Based Types of Sofas
Configuration shapes how a sofa fits and functions in your room. The main options each serve different needs.
Key configuration types:
- Sectional: Large, multi-piece units that form L or U shapes. Fixed arrangement.
- L-shape: An L-shaped sofa anchors corners and defines zones in open-plan rooms.
- U-shape: Wraps around three sides. Ideal for large families or frequent entertainers.
- Modular: Individual pieces you can rearrange freely. Maximum flexibility.
Modular sofas suit renters and frequent redecorators. You can shift pieces when moving homes or redesigning rooms. Fixed sectionals work better for permanent setups where stability matters more than change.
Quick tip: Measure your corner space before ordering. Add a 10 cm buffer on each side to avoid that awkward "it almost fits" situation.
The trade-offs are real. Larger configurations cost more, weigh more, and move with difficulty. But for joint families or those who host often, the seating capacity justifies the investment.
Different Types of Sofa Designs by Style
Style gives your sofa its visual personality. Three umbrella aesthetics cover most options available today.
Classic and Traditional
Traditional sofa sets feature rolled arms, deep tufting, and carved wooden frames. They pair well with rich colours like maroon, emerald, and gold. A Chesterfield with its diamond-button leather is the icon of this category.
Mid-Century Modern
Clean lines, tapered legs, and minimal ornamentation define mid-century sofas. Neutral tones and muted jewel colours work best. These pieces add retro charm without overwhelming a room.
Contemporary
Low profiles, geometric forms, and bold angles mark this style. Grey, white, and black dominate. Contemporary Sofa Sets design suit modern flats with clean, fuss-free aesthetics.
Your existing room decor should guide style choice. A carved wooden Chesterfield looks odd in a minimalist grey flat. Match the era and mood of your space for visual harmony.
Material Choices That Define Your Sofa
Material affects how your sofa looks, feels, and lasts. Each option suits different households.
🛋️ Leather
Durability: High
Maintenance: Low (needs conditioning)
Cost Range: Higher
Best For: Pet-free homes and those who prefer easy-to-clean furniture.
---
🧵 Fabric
Durability: Medium
Maintenance: Medium (spot cleaning)
Cost Range: Moderate
Best For: Variety seekers and budget-conscious buyers.
---
✨ Velvet
Durability: Medium
Maintenance: High (careful cleaning)
Cost Range: Higher
Best For: Style-focused homes and low-traffic rooms.
---
🌳 Wood Frame
Durability: Very high
Maintenance: Low
Cost Range: Varies
Best For: Those who change upholstery often.
Leather sofa sets age gracefully but need occasional conditioning to prevent cracks. Fabric offers endless colour and pattern choices but stains more easily. Velvet delivers luxury but demands gentle handling.
Pet owners and families with young children should lean toward leather or tightly woven fabrics. Both resist scratches and wipe clean quickly. Material choice directly shapes your cleaning routine, so pick with daily life in mind.
Function-Driven Types of Sofa for Modern Homes
Functional sofas solve specific problems. They cost more but add genuine value for the right household.
Functional categories and ideal users:
- Recliners: Manual or electric options. Perfect for elderly users or anyone with back concerns.
- Sofa beds: Pull-out or fold-down mechanisms. Essential for studio flats or guest rooms without spare beds.
- Storage sofas: Lift-up seat compartments. Great for organisers and small-space dwellers.
- Daybeds: Multi-purpose lounging and sleeping. Suits single occupants or reading nooks.
Before buying, test mechanisms in person when possible. Check how smoothly recliners extend. Listen for creaks in fold-out frames. Quality mechanisms last years; cheap ones fail within months.
Did you know? Electric recliner mechanisms typically last 8 to 10 years with regular use, while manual ones can exceed 15 years due to fewer moving parts.
Functionality adds convenience but also weight and cost. Focus on the one or two features your household actually needs rather than collecting every option.
How to Select the Right Sofa for Your 2026 Living Room
Use this checklist before committing to any purchase:
- Measure thrice, buy once. Map your floor space and doorways with a tape measure.
- Match lifestyle needs. Pets, children, and entertaining frequency all affect material and size choices.
- Plan your colour. Neutral shades last longer visually; bold tones work as statement accents.
- Set a budget band. Know your ceiling before browsing to avoid temptation.
- Test in person when possible. Sit, recline, and check cushion firmness at a showroom.
- Confirm delivery logistics. Elevator access and stairwell width matter more than you think.
- Verify frame quality. Hardwood frames outlast particleboard by years.
- Check sustainability credentials. Eco-friendly materials and certifications matter in 2026.
The trend this year points toward modular, adaptable seating that grows with changing needs. Flexibility wins over fixed arrangements for modern households.
Also Read: 10 Jaw-Dropping Sofas to Style Your Living Room
Maintaining Different Types of Sofas
Proper care extends sofa life significantly. A simple schedule keeps most pieces looking fresh.
Care routine by frequency:
- Weekly: Vacuum with a soft brush attachment. Rotate cushions to even out wear.
- Monthly: Spot-clean stains using fabric-safe solutions. Wipe leather with a damp cloth.
- Annually: Book professional deep cleaning for upholstered pieces.
Placement matters as much as cleaning. Keep sofas at least 30 cm from heat sources like radiators. Use window treatments to block direct sunlight, especially on leather. UV rays fade colours and dry out natural materials faster than you expect.
Following manufacturer care instructions preserves warranty coverage. Different materials demand tailored approaches, but these core habits apply across the board.
"Across all silhouettes, the most timeless sofa isn’t defined by style but by spatial awareness and sensitivity - to proportion, texture, and light" - Architectural Digest India
Finding the Right Types of Sofa for Your Space
Understanding types of sofa across capacity, configuration, style, material, and function puts you in control. No more guesswork, no more overwhelm. You now have a framework to evaluate any option you encounter.
The best sofa balances visual appeal with practical household needs. Apply this 2026 checklist when browsing options at Pepperfry, where you will find different types of sofas for every living room vision. Your perfect sofa is out there. Now you know how to find it.
Frequently Asked Questions (FAQs)
1. Which sofa type works best for small living rooms?
Compact two seater sofas or L shaped configurations suit small rooms well. They maximise seating without eating floor space. Modular pieces also work because you can start small and add sections later. Stick to light colours and slim arms to keep the visual weight low.
2. What frame material offers the longest lifespan?
Solid hardwood frames like teak or sheesham outlast all alternatives. They resist warping and handle weight stress for decades. Avoid particleboard or plywood frames if longevity matters. A hardwood frame can last 20 years or more with basic care.
3. What are the trending sofa colours for 2026?
Warm neutrals like oatmeal, camel, and soft olive lead the trends this year. Earthy tones create calm spaces. Bold accents in terracotta and deep blue work for statement pieces. Grey remains popular but is shifting toward warmer undertones.
4. How do modular sofas differ from sectional sofas?
Sectionals are fixed multi piece units sold as a set. Modular sofas consist of separate pieces you can rearrange freely. Modular offers flexibility for changing rooms or moving homes. Sectionals provide a cohesive look without configuration effort.
5. What is the average lifespan of a recliner mechanism?
Electric recliner mechanisms typically last 8 to 10 years with regular use. Manual mechanisms can exceed 15 years because they have fewer parts that wear out. Quality matters significantly here. Test mechanisms before buying and check warranty terms.
6. Can fabric sofas handle households with pets and children?
Yes, with the right fabric choice. Tightly woven materials resist scratches and clean easily. Performance fabrics with stain resistant coatings handle spills well. Avoid loose weaves and delicate textures. Darker colours and patterns hide minor marks better than solid light shades.
31 Jul 2026
Bonhomie
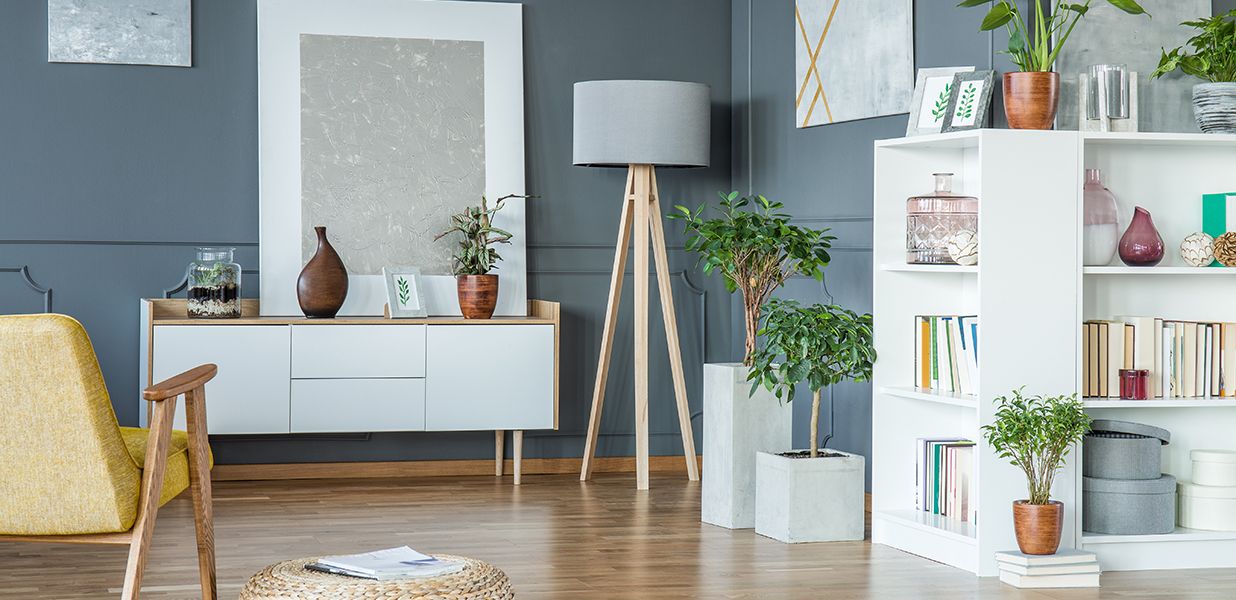
Home Decor Hacks to Transform Every Corner of Your Home
That awkward corner next to the sofa. The empty space beside your bedroom window. The spot near the dining table that collects dust. Every home has these forgotten zones, and they bother you more than you'd admit. Good corner room decor fixes this problem whilst adding storage, style, and personality to your space.
This piece covers ten practical ideas for decor for corners, room-by-room checklists, budget breakdowns, and simple DIY projects you can finish this weekend. Time to put those neglected spaces to work.
What Makes Corner Room Decor Worth Your Time?
Bare corners create visual imbalance. Your eye travels across a room and stops at empty spaces, making the whole area feel unfinished. This matters more than most people think.
Well-styled corners offer real benefits. You gain extra storage without eating into floor space. Rooms feel more balanced and put-together. Corners can define zones in open-plan layouts. And yes, good corner styling adds resale appeal when you decide to move.
Before you start shopping, run through this quick checklist:
- Does the corner collect clutter? That signals a need for storage solutions.
- Does it feel dark? Lighting should be your first priority.
- Does it break the room's flow? Visual elements like plants or art can fix this.
If you answered yes to any of these, keep reading.
Check-out Home Decor Collection at Pepperfry --->
10 Corner Room Decor Ideas That Work in Any Space
The ideas below work across budgets and room sizes. Some need basic tools. Others need just a trip to Pepperfry's collection. Mix and match based on your needs, space, and style preferences.
Floating Shelves and Display Ledges
Mount shelves at eye level, typically between 150 and 180 cm from the floor. Check weight limits before loading them up. Style in layers: stack two or three books horizontally, add a small plant, and lean a framed photo behind them. DIY installation with wall anchors takes under thirty minutes. Budget MDF options start low, whilst solid wood versions cost more but last longer.
"A corner shouldn't just be an afterthought where you stash an extra chair. It should be intentionally designed to strike a work-life balance - concocting dedicated corners of respite where you can actually pause and unwind." - Rasneet Anand, Designer
(Elle Decor India)
Tall Indoor Plants for Natural Drama
Rubber plants, fiddle leaf figs, and areca palms suit most homes well. Choose pots with drainage holes and size them two inches wider than the root ball. Position near windows for natural light. Water weekly during summer, fortnightly in winter. Feed with liquid fertiliser once a month during the growing season. These living room corner decor ideas bring colour without fuss.
Statement Floor Lamps That Anchor the Space
Floor lamps turn dark corners into cosy spots. Arc designs work best under high ceilings. Tripod styles suit rooms with standard 2.7-metre ceilings. Pick bulbs around 2700K for warm, relaxed light. Tuck cables along skirting boards to avoid tripping hazards. One well-placed lamp changes how a room feels after sunset.
Reading Nooks for Book Lovers
A compact armchair or stack of floor cushions creates a retreat. Add a small side table for your cup of tea and current read. Layer two or three pillows for comfort. Place a rug underneath to define the zone. Mount a wall sconce about 60 cm above shoulder height for reading light without eye strain. Perfect living room corner decor ideas for book lovers.
Compact Corner Workstations
Floating desks or 90-degree modular units maximise tight spaces. Add an under-desk cable tray to hide wires. Wall-mounted monitor arms free up surface area. A blue-light task lamp reduces eye strain during long work sessions. Position your chair with 90 cm clearance for easy movement. Remote work deserves a proper setup.
Artwork and Mirror Clusters
Gallery walls with odd numbers of frames look balanced. Try three or five pieces spanning both walls that meet at the corner. Use painter's tape to map positions before drilling. Mirrors placed opposite windows bounce natural light deeper into the room. A triptych arrangement makes even small corners feel intentional.
Storage Benches and Decorative Trunks
Vintage trunks serve triple duty: storage, seating, and surface space for vases or books. Stick felt pads underneath to protect your flooring. Use them to store seasonal items like winter throws or extra cushions. The weathered look adds character. New leather-bound options suit modern rooms better.
Ladder Shelves for Vertical Storage
Style from top to bottom: plant on the top rung, books at mid-level, woven baskets at the base. These pieces lean against walls, so secure them with a hidden L-bracket to prevent tipping. An essential safety step if children or pets live with you. The graduated shelves draw the eye upward, making ceilings feel taller.
Vertical Green Walls
Prefabricated modular panels make installation simple. DIY moss frames offer a low-maintenance option for renters. Both need basic misting systems for watering. Budget fifteen to twenty minutes monthly for care: checking moisture, trimming overgrowth, and inspecting for pests. Vertical gardens work brilliantly in corners with no floor space to spare.
Budget DIY Pebble Zen Gardens
Layer a weed mat as your base. Add river pebbles in varying sizes. Place small succulents or battery-operated candles on top. Solar fairy lights create an evening ambience. Total cost: under Rs 1,500 from local nurseries or Pepperfry. This project takes an afternoon and transforms any forgotten corner into a calm spot.
Quick Tip: Start with the corner you see most often, usually in your living room or bedroom. One well-styled corner inspires you to tackle the rest.
How to Adapt Corner Room Decor for Every Room Type
Each room serves different purposes, so corner solutions need to match. Use the ten ideas above as your starting point, then adapt using these room-specific notes.
Living Room Corners
Keep the entertainment flow in mind. Avoid placing tall items that block speaker paths or TV sightlines. Pair a tall plant with a floor lamp to create visual triangle balance. Stick to neutral or earthy tones that complement your existing furniture. These living room corner decor ideas blend function with style.
Bedroom Corners
Soft, warm lighting matters most here. Choose bulbs at 3000K or warmer. Leaning mirrors add depth without taking wall space. A small vanity setup works well for morning routines. Storage ottomans hold extra linens without cluttering the room. Keep this space calm and restful.
Home Office Corners
Ergonomics comes first. Leave a minimum of 90 cm around your chair for movement. Vertical pegboards keep supplies organised and visible. Cable management and adjustable task lighting are non-negotiables for productivity. Your corner workstation should support focus, not fight against it.
Nursery and Kids' Room Corners
Safety guides every choice. Pick furniture with rounded edges. Add soft floor mats underneath play areas. Mount book ledges at child eye level for easy access. Bright, playful colours work well. Storage baskets make tidying simple for young ones.
Small Studio Apartments
Space-saving solutions rule here. Fold-down wall desks disappear when not in use. Mirrored panels amplify light and create depth. Floating storage cubbies mounted above two metres keep floors clear. Multi-functional pieces that serve double duty, like benches with hidden storage, earn their place.
Also Read: Living Room Decor Ideas, Tips & Essentials
Budget vs. Premium Corner Decor: What's Worth the Splurge?
Your budget shapes your choices. Here is a quick comparison:
🪵 Floating Shelf
- Budget Option (Under Rs 2,000): MDF with basic brackets
- Premium Option (Above Rs 10,000): Solid teak with concealed mounts
---
💡 Floor Lamp
- Budget Option (Under Rs 2,000): Basic tripod with a metal finish
- Premium Option (Above Rs 10,000): Brass arc lamp with a dimmer switch
---
🪴 Plant Pot
- Budget Option (Under Rs 2,000): Ceramic with a standard glaze
- Premium Option (Above Rs 10,000): Handcrafted terracotta with an aged finish
---
🪑 Storage Bench
- Budget Option (Under Rs 2,000): Fabric-covered with a pine frame
- Premium Option (Above Rs 10,000): Leather upholstery with a sheesham wood base
---
🪜 Ladder Shelf
- Budget Option (Under Rs 2,000): Powder-coated metal
- Premium Option (Above Rs 10,000): Solid mango wood with a natural finish
Renters benefit from detachable, movable options like freestanding shelves and lightweight lamps. Homeowners might consider custom millwork or built-in seating for resale value. Pepperfry's range covers both ends, so you can mix high and low within the same room.
Common Corner Room Decor Mistakes You Should Avoid
Watch out for these five errors:
- Overcrowding with small items creates visual clutter. Group three to five pieces maximum.
- Skipping lighting layers leaves corners feeling flat. Combine ambient and task light.
- Blocking AC vents or outlets causes practical problems. Measure before you place.
- Poor cable management looks messy. Use clips, trays, or cord covers.
- Choosing the wrong plants leads to brown leaves. Check the light needs before buying.
Try These DIY Corner Room Decor Projects This Year
Fancy a hands-on project? These three work well for beginners.
Mini Floating Desk
- Cut a 60 x 40 cm board from ply or MDF
- Sand the edges smooth and apply two coats of paint
- Attach heavy-duty L-brackets to wall studs
- Mount the board onto the brackets at 75 cm height
- Add a small shelf above for supplies
Upcycled Trunk Bench
- Find an old trunk at a flea market
- Sand and repaint the exterior
- Cut foam to fit the lid
- Wrap foam in fabric and staple underneath
- Add furniture feet for extra height
Two-Tone Accent Wall
- Mark a diagonal line using painter's tape
- Paint the lower section in a darker shade
- Let dry completely before removing tape
- Touch up any bleed with a small brush
Safety Note: Wear eye protection when sanding and ensure good ventilation when painting. Keep tools away from children.
Also Read: Stylish Home Decor Ideas for Bachelors
Ready to Bring Your Corners to Life with Corner Room Decor?
Corners offer untapped potential. They can store, display, zone, and beautify when you approach them with intention. The right decor for corners turns wasted space into a feature.
Start small. Pick one idea from this list and tackle it this weekend. A single well-styled corner shifts how your whole room feels. Ready to find the right pieces? Browse Pepperfry's full collection for quality options that suit any budget and style.
Frequently Asked Questions (FAQs)
1. What is the quickest budget fix for an empty corner?
A tall plant paired with a simple floor lamp works fast and costs little. Add a woven basket at the base to hide the pot and create a layered, finished look in under an hour.
2. Which plants work best in low-light corners?
Snake plants, pothos, and ZZ plants thrive in dim spaces. They need water only every two weeks and tolerate neglect well. Avoid fiddle leaf figs in dark corners as they need bright, indirect light.
3. How tall should a corner floor lamp be for a 3 metre ceiling?
Aim for 150 to 180 cm. Arc lamps can go taller since the light curves outward. Tripod designs should stay under 170 cm to keep proportions balanced in standard rooms.
4. Can I install floating shelves in a rental without damaging the walls?
Yes. Use adhesive mounting strips rated for your shelf weight. Some systems hold up to 7 kg per strip. Remove them slowly when moving out and touch up any marks with matching paint.
5. How do I make ladder shelves safe for homes with children?
Secure the ladder to the wall using a hidden L bracket near the top. Place heavier items on lower rungs to lower the centre of gravity. Avoid glass or sharp edged decor within reach.
31 Jul 2026
Bonhomie
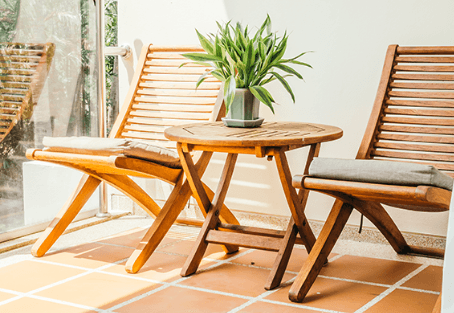
10 Dos and Don'ts of Maintaining Your Wooden Furniture
That sheesham dining table your grandmother polished every Sunday? It still gleams decades later. Wood ages beautifully when cared for properly. Yet neglect turns a treasured piece into a cracked, faded disappointment within years. Knowing how to maintain wooden furniture saves you from costly repairs and keeps your home looking its best.
This article shares ten dos and don'ts for wooden furniture maintenance, plus a 2026 care calendar you can follow right away. Simple habits make all the difference. Your furniture deserves the same love that went into choosing it.
Wood Care Fundamentals: Before You Begin
Before applying any care tips, understanding wood's nature helps you protect it better. Wood breathes. It absorbs moisture when humidity rises and releases it when the air dries out. This constant movement causes expansion and contraction that leads to warping or cracking when conditions swing too wildly.
For furniture maintenance success, aim for indoor humidity between 40 and 60 per cent. Keep room temperatures stable. UV rays from sunlight fade finishes and dry out fibres over time. Outdoor pieces face even harsher conditions from rain and temperature swings.
Check-out Furniture at Pepperfry --->
Gather these basics before you start:
- Soft microfibre cloths (two or three)
- Mild dish soap
- Natural wax or polish
- Warm water in a spray bottle
- Felt pads for furniture feet
Browse Pepperfry's furniture care collection for quality products that make upkeep simple.
5 Essential Dos: How to Maintain Wooden Furniture
Adopting these five habits protects your investment and extends furniture life by years. Start with at least three and build from there.
Dust Weekly with a Soft Microfibre Cloth
Dust particles act like fine sandpaper. They scratch and dull your finish over time. A quick two-minute wipe each week prevents this damage. Use soft microfibre or cotton cloths rather than paper towels, which can leave tiny scratches.
Cleaning Tip: For carved details or intricate mouldings, a vacuum brush attachment works well. Place a soft screen over upholstered sections to prevent snagging.
This simple wooden furniture maintenance habit keeps surfaces smooth and lustrous between deeper cleans.
Clean Spills Immediately to Prevent Staining
Liquids penetrate wood grain within minutes. Quick action prevents permanent marks. Keep a cloth handy in dining and living areas where spills happen most.
Follow this three-step method for furniture maintenance:
- Blot with a dry cloth first
- Wipe gently with a barely damp cloth
- Dry completely with a fresh cloth
A mild soap solution (a few drops in warm water) handles most sticky messes without harming the finish.
"Solid wood rewards homeowners with lasting beauty, but it requires ongoing care. Routine maintenance is what allows natural wood furniture to retain its character and durability over time."- Houzz
Control Indoor Humidity Between 40 and 60 Per cent
Wood expands in humid conditions and shrinks when the air turns dry. This constant movement strains joints and creates cracks. An affordable hygrometer from any hardware shop helps you monitor levels.
Keep wooden furniture maintenance on track by positioning pieces away from heating vents and direct airflow that causes uneven drying.
Seasonal Tip: During dry winter months, a small humidifier adds needed moisture. In humid summers, air conditioning or a dehumidifier balances things out.
Polish and Wax Every Six Months
Polish adds shine. Wax creates a protective barrier. Both work together for lasting beauty. The two-cloth technique keeps things simple: apply product with one cloth, wait five minutes, then buff with the other.
Quick Tip: Avoid silicone-based commercial sprays. They build up over time and create a hazy film. A natural mix of olive oil and vinegar works well for routine upkeep.
Check out Pepperfry's furniture care kits for quality waxes and polishes that protect your investment.
Protect Outdoor Wood Furniture with Annual Sealant
UV rays and rain accelerate wear on outdoor pieces. Applying exterior-grade sealant or protective oil once yearly shields against the elements. During monsoon season or when you store pieces away, breathable covers prevent moisture buildup whilst blocking debris.
Here is a simple test to maintain outdoor wood furniture: splash a few drops of water on the surface. If it soaks in rather than beading up, your furniture needs resealing. This quick check takes seconds and prevents months of weather damage.
Also Read: Aesthetic Furniture Ideas and Inspiring Designs
5 Critical Mistakes That Damage Your Furniture
These common errors undo your positive care efforts and shorten furniture lifespan considerably. Most are easy to avoid once you know what to watch for.
Avoid Placing Furniture in Direct Sunlight
Prolonged UV exposure fades finishes and creates uneven colour patches. That beautiful walnut table develops one light side and one dark side when positioned near a window. This damage happens gradually, making it easy to overlook until the contrast becomes obvious.
Good wooden furniture maintenance means thinking about light as much as dust.
Budget Tip: Window films or sheer curtains offer low-cost protection. Rotate pieces near windows every few months to distribute exposure evenly.
Never Use Harsh Chemical Cleaners on Wood
Certain products strip protective finishes and dry out wood fibres quickly.
Avoid these chemicals completely:
- Ammonia
- Bleach
- Silicone sprays
- Alcohol-based cleaners
These ingredients damage both the finish and the wood beneath. Stick with the mild soap solution mentioned earlier for furniture maintenance that protects rather than harms. Your grandmother's gentle approach worked for good reason.
Stop Dragging Heavy Objects Across Surfaces
Dragging creates micro-tears in the finish and weakens joinery over time. Lift items rather than sliding them. For frequently moved objects like laptops or decorative pieces, adhesive felt pads prevent scratches.
Quick Remedy: If accidents happen, a walnut kernel rubbed over shallow scratches helps disguise them. The natural oils fill minor damage temporarily.
For deeper marks, colour-matched wax sticks from any hardware shop provide a more permanent fix.
Never Place Hot or Wet Items Directly on Wood
Heat creates those stubborn white rings everyone dreads. Moisture leaves dark marks that penetrate deeper into the grain. Both types of damage prove difficult to reverse once set.
Use coasters, trivets, and placemats consistently. Make them part of your table setting rather than an afterthought. For existing heat rings, try this remedy: mix equal parts toothpaste and baking soda into a paste, apply gently with a soft cloth, and wipe clean. This works best on recent marks.
Address Small Scratches Before They Worsen
Minor scratches invite moisture into the wood. What starts as a tiny mark becomes a deeper gouge over time. Early repair prevents this progression and keeps your finish intact.
Did You Know? A walnut kernel rubbed over light scratches deposits natural oils that mask damage. The fix takes seconds and costs almost nothing. For darker woods, colour-matched wax sticks blend scratches into the surrounding surface.
Link this preventive mindset to your biannual polishing schedule. Regular finish protection catches problems whilst they remain simple to fix.
Also Read: Understanding the Art of Combining Furniture Styles
Your 2026 Furniture Maintenance Calendar
Want to know how to maintain wooden furniture throughout the year? Save this month-by-month plan for consistent care throughout the year:
- Weekly (all year): Dust all wooden surfaces with a microfibre cloth
- March: Apply polish and wax to indoor pieces; inspect for winter damage
- April: Reseal outdoor wood furniture before summer begins
- July: Deep clean all wooden surfaces; check for humidity damage
- September: Second polish and wax application for indoor furniture
- November: Inspect joints and hardware; tighten loose fittings
Mark these tasks in your phone calendar with reminders. Consistent furniture maintenance prevents the expensive repairs that come from neglect. Your wooden beds, dining tables, and storage units all benefit from this simple schedule.
"Well-seasoned and properly treated wood can withstand years of daily use, making preventive care and protective finishes some of the most valuable investments a homeowner can make."-Good Homes
Small Steps in Wood Care Deliver Lasting Results
Consistent small actions prevent expensive repairs and preserve furniture's beauty for years. The 2026 calendar removes guesswork from how to maintain wooden furniture. Print it, save it, and follow it throughout the year.
Start today by choosing one do and avoiding one don't. Build momentum with small wins. Within months, good habits become automatic. Browse Pepperfry's complete furniture collection, knowing that proper care will keep every piece looking wonderful for decades to come.
Frequently Asked Questions (FAQs)
1. How often should I polish wooden furniture to maintain its shine?
Polish wooden furniture every six months for best results. Apply a thin coat of quality paste wax, wait five minutes, then buff with a soft cloth. Avoid silicone based sprays as they create buildup over time. Natural wax products provide better long term protection.
2. What is the best way to remove water stains from wood furniture?
For white water rings, apply a paste of equal parts toothpaste and baking soda. Rub gently with a soft cloth, then wipe clean. Dark stains penetrate deeper and may need light sanding followed by refinishing. Act quickly on fresh spills to prevent permanent marks.
3. Can I use vinegar to clean all types of wooden furniture?
Diluted vinegar works safely on most sealed wooden surfaces. Mix one part white vinegar with four parts water. Avoid using it on unfinished or waxed wood, as acidity may damage these surfaces. Test on a hidden area first and wipe dry immediately after cleaning.
4. How do I protect outdoor wooden furniture during the monsoon season?
Cover outdoor pieces with breathable furniture covers that prevent moisture buildup. Move smaller items to covered areas when possible. Apply a fresh coat of exterior grade sealant before the monsoon arrives. Check drainage around furniture to prevent standing water contact.
5. What humidity level is ideal for preventing wooden furniture damage?
Maintain indoor humidity between 40 and 60 per cent. Use a hygrometer to monitor levels. Run a humidifier during dry winter months and a dehumidifier during humid summers. Keep furniture away from heating vents and air conditioning units that create localised drying.
6. How can I repair minor scratches on wooden furniture at home?
Rub a walnut kernel over light scratches to deposit natural oils that mask damage. For deeper marks, use colour matched wax sticks or wood markers available at hardware shops. Clean the area first, apply the product following the grain direction, then buff lightly with a soft cloth.
30 Jul 2026
Bonhomie

Internal or External Window Shutters: Which One Should You Go With?
You have finally decided to upgrade your windows. The old curtains look tired, the plastic blinds have seen better days, and you want something that feels more finished. Window blind shutters keep appearing in your search results. They promise better light control, added privacy, and that polished look you see in design magazines. But then comes the real question: should you mount them inside or outside?
Both options serve different purposes. Your choice depends on climate conditions, security needs, and how you want your home to feel. This comparison breaks down each type so you can pick with confidence.
What are Window Blind Shutters?
Window blind shutters combine the structure of traditional shutters with adjustable slats or louvres. Unlike standalone fabric blinds that hang from a rail, these have rigid frames that anchor to your window. They differ from solid panel shutters too, which offer no way to fine-tune light.
The slats tilt open or closed, giving you precise control over brightness and airflow. Most homeowners find this flexibility ideal for bedrooms, living rooms, and home offices where lighting needs change throughout the day.
Materials vary widely. Wooden window shutters bring warmth and grain texture that suits heritage homes and classic interiors. Composite versions resist moisture better, making them practical for bathrooms and kitchens. PVC options sit at the budget end and handle humidity without warping.
Beyond aesthetics, these shutters add a layer of insulation. Closed slats trap air between the glass and your room, reducing heat transfer in summer and keeping warmth inside during winter months. This thermal benefit often surprises first-time buyers who expected shutters to be purely decorative.
Where you place these shutters shapes their performance. Interior mounting keeps everything accessible and protected from weather. Exterior mounting adds storm defence and security at the cost of easy adjustment. The sections ahead cover each approach in detail.
Browse Blinds -->
How Do Windows with Interior Shutters Work?
Windows with interior shutters have panels mounted within the window recess or directly onto the frame. They sit flush with your interior wall, creating a clean line that blends with most room styles.
Several configurations exist. Full-height panels span the entire window, offering uniform coverage and a streamlined appearance. Tier-on-tier systems split the window into upper and lower sections, letting you adjust each independently. This works well for street-facing rooms where you want privacy at eye level but natural light from above. Café-style half panels cover only the bottom portion, a charming option for kitchens and breakfast nooks.
"In Indian design, managing the harsh afternoon sun is crucial. Wooden louvred shutters allow you to manipulate light and shadow like an art form, painting the floors with dynamic patterns throughout the day while ensuring continuous cross-ventilation." - Ashiesh Shah, Architect (Elle Decor India)
The functional benefits are straightforward. You reach the tilt rod or louvre bar without leaving your chair. Thermal insulation improves because the shutter layer traps still air against the glass. Modern or traditional interiors both accommodate these designs, and wooden window shutters in particular add character to period homes.
Trade-offs exist. You lose some windowsill space when the panels fold inward. Shallow window recesses may not provide enough depth for a proper fit. Measure your recess carefully before ordering.
These shutters suit spaces where you control the installation environment. Since they stay indoors, maintenance remains simple, and weather plays no role in wear.
Also Read: Window Blinds Design Ideas and Stylish Patterns
Wood, Composite, or PVC?
Material choice affects look, durability, and price. Here is a quick comparison:
Wood: Premium choice with natural grain patterns. Suits heritage homes and warm colour schemes. Requires periodic sealing or conditioning to prevent warping. Sits in the higher price bracket.
Composite: Engineered mix of wood fibres and polymers. Resists moisture well, making it ideal for bathrooms and kitchens. Mid-range cost with less upkeep than solid timber.
PVC: Budget-friendly and waterproof. Handles high humidity without fading or peeling. Best for rental properties or coastal areas where salt air accelerates wear.
In 2026, eco-friendly finishes and water-based paints have grown popular. These extend lifespan without harsh chemicals, a welcome shift for health-conscious households.
What Makes External Window Shutters Different?
External shutters mount on the building's outer face, shielding glass from the outside world. Their primary role is defence rather than decoration, though they certainly change how a façade looks.
Storm protection tops the list of benefits. Reinforced panels or lockable window roller shutters block debris during heavy weather. Coastal homes and areas prone to cyclones often require this level of security. Noise reduction follows closely. A solid barrier between street traffic and your interior cuts sound transmission noticeably, a relief for homes near busy roads.
Security improves too. Ground-floor windows become less tempting targets when covered by steel or aluminium panels. Some homeowners add these specifically as a deterrent, not for weather at all.
Aesthetic impact varies. Roller systems retract into a housing box above the window, staying discreet when not in use. Bahama-style panels protrude at an angle, giving a tropical resort feel. Louvred security shutters add an industrial edge. Each choice shapes your home's street presence differently.
Did you know? External roller shutters can reduce indoor temperatures by up to 10 degrees Celsius during peak summer, cutting air conditioning costs significantly.
Keep planning rules in mind. Heritage zones and conservation areas may restrict external modifications. Check with local authorities before ordering.
Also Read: Stylish Window Blinds Design & Fabric Blind Inspirations
Roller, Bahama, and Security Options
Each exterior style serves a distinct purpose:
- Roller shutters: Compact design that retracts into a top-mounted housing. Popular in urban settings for both security and heat control. Motorised versions integrate with smart home systems for remote operation.
- Bahama shutters: Hinged at the top and propped outward at an angle. Ideal for tropical or coastal climates where shade and hurricane defence matter. Adds a distinctive look to façades.
- Louvred security shutters: Heavy-duty panels with fixed or adjustable slats. Suited for ground-floor windows or areas with higher break-in risk. Often made from steel or reinforced aluminium.
Cost tiers vary. Manual roller systems sit at the entry level, while motorised and smart-enabled versions climb higher. Bahama shutters fall mid-range, and reinforced security panels command premium prices.
Internal vs External Window Blind Shutters: Which Performs Better?
Both types excel in different areas. The table below compares key attributes to help you weigh priorities.
🌞 Light Control
Internal Shutters: Winner
External Shutters: Good
Notes: Interior slats allow finer adjustment.
🌡️ Thermal Insulation
Internal Shutters: Strong
External Shutters: Strong
Notes: Both trap air; external shutters add sun blocking.
🌧️ Weather Defence
Internal Shutters: Minimal
External Shutters: Winner
Notes: External panels shield against storms.
🛠️ Durability
Internal Shutters: High indoors
External Shutters: High with upkeep
Notes: Exterior exposure demands regular care.
🎨 Aesthetic Flexibility
Internal Shutters: Winner
External Shutters: Moderate
Notes: Interior options suit varied décor styles.
🔒 Security
Internal Shutters: Moderate
External Shutters: Winner
Notes: Exterior panels deter break-ins.
🚪 Ease of Access
Internal Shutters: Winner
External Shutters: Requires going outside
Notes: Interior adjustment is instant.
Climate plays a deciding role. Humid coastal areas favour external window roller shutters for weather defence. Temperate inland regions may prioritise the insulation and elegance of wooden window shutters mounted inside. Neither option wins universally; context determines the better fit.
How Much Do Window Blind Shutters Cost in 2026?
Prices vary by material, size, and features. Here are ballpark ranges:
Wooden interior shutters typically sit in the mid-to-high bracket, ranging from Rs 8,000 to Rs 25,000 per window depending on timber species and finish. PVC interior options start around Rs 3,500, making them accessible for budget-conscious buyers. Composite falls between, balancing cost and durability.
External shutters cost more due to reinforced materials and weatherproofing. Manual roller systems begin near Rs 12,000 per window. Motorised versions climb to Rs 30,000 or higher with smart integration. Heavy security panels command premium prices, especially for custom sizing.
Cost drivers include custom dimensions, motorisation, reinforced locking mechanisms, and premium powder-coat finishes. Simple interior shutters often suit DIY installation, while external roller or security panels require professional fitting and sometimes scaffolding access.
Fitting timelines differ too. Interior installs typically complete within a day with minimal disruption. Exterior work may take longer if façade access proves tricky.
Budget tip: Factor in long-term maintenance and energy savings when comparing upfront costs. A slightly pricier shutter that lasts fifteen years often beats a cheap option needing replacement in five.
Keeping Your Shutters in Top Condition
Routine care extends the life of any shutter type.
For wooden interior units, dust slats weekly with a soft cloth. Apply wood conditioner or eco-friendly sealant every twelve to eighteen months to prevent warping. Avoid harsh chemical cleaners that strip natural oils.
For exterior shutters, weatherproofing checks matter most. Inspect roller mechanisms for debris buildup each season. Re-seal joints annually to block moisture intrusion. Repaint or powder-coat every three to five years to resist rust and UV fade, especially in coastal areas where salt accelerates corrosion.
Simple part replacements keep shutters functional longer. Worn slats swap out easily on most models. Motorised tracks benefit from lubrication twice a year to maintain smooth operation.
Frame maintenance as a modest investment rather than a chore. A few hours each year preserves both function and appearance across decades of use.
Finding Your Best Window Blind Shutters Match in 2026
The choice between internal and external shutters comes down to priorities. Windows with interior shutters deliver refined light control and complement your décor. External models provide robust protection against weather, noise, and intruders.
Neither type wins outright. Climate exposure, aesthetic goals, and security needs all shape the right decision. Assess your specific situation using the comparison points above. Measure your windows accurately and check local building codes if external modifications are planned.
With clear priorities and proper measurements, you can select window blind shutters that balance form, function, and budget for years to come.
Check-out Curtains -->
Frequently Asked Questions (FAQs)
1. How long do window blind shutters typically last?
Quality interior shutters last fifteen to twenty five years with proper care. Exterior versions may need component replacements sooner due to weather exposure, but well maintained roller shutters often exceed fifteen years.
2. Do internal shutters provide meaningful insulation?
Yes. Closed slats trap a layer of still air between the glass and your room, reducing heat transfer. Many homeowners notice lower heating and cooling bills after installation.
3. Can external roller shutters be automated or controlled remotely?
Absolutely. Many 2026 models integrate with smart home systems, allowing app based control or voice commands. Motorised versions also accept wall mounted switches and timers.
4. Are window blind shutters suitable for rental properties?
PVC interior shutters work well for rentals. They handle wear, resist moisture, and cost less to replace if damaged. Check tenancy agreements before modifying windows.
5. How do I match shutter colours to my existing interior or exterior scheme?
Start with your wall paint or façade finish as a baseline. Neutral whites and off whites blend easily. Bolder colours work when matched to trim or door frames for a coordinated look.
6. What maintenance is required for wooden window shutters in humid climates?
Dust weekly and apply wood conditioner every six to twelve months. Use a dehumidifier in the room if possible, and wipe away any condensation promptly to prevent warping.
29 Jul 2026
Bonhomie

How to Decorate Your Kitchen: Ideas That Blend Style with Functionality
You want a kitchen that looks great. But you also need it to work hard every single day. Good kitchen decor ideas sit right at that sweet spot where beauty meets daily function.
This is not about surface styling alone. It is about making choices that help you cook, clean, and enjoy your space. The good ideas you will find here suit any layout, any budget.
What follows is a mix of 2026 trend insights, smart storage fixes, small space tactics, and budget DIY projects. Every tip ties back to one simple goal: a kitchen decoration design that serves you well while looking the part.
What Should You Define Before Choosing Kitchen Decor Ideas?
Before you browse or buy anything, pause. Take a moment to pin down what you actually want. This simple step saves money and stops you from ending up with pieces that do not quite fit.
Start by noting your colour leanings. Do you prefer warm wood tones or cooler whites? Think about materials, too. Glossy tiles or matte finishes? Then map your workflow. Where do you chop, cook, and wash up? Your decor should support that triangle, not block it.
A quick mood board helps. Use free apps to collect images that feel right. Note the limits you already have: the cabinet colour that stays, the fridge that cannot move, and the window that needs clear space.
Your pre-decor checklist:
- List three must-have functions (storage, prep space, seating)
- Pick a mood (cosy, sleek, rustic, bright)
- Note what stays and what can change
- Decide if changes are long-term or seasonal swaps
- Set a rough budget range
This clarity shapes every decision that follows.
Kitchen Decor Ideas Tailored to Your Layout
Your layout dictates what works. A trick that shines in an open plan kitchen may feel wrong in a narrow galley setup. Match your decor moves to your floor plan, and both style and traffic flow improve.
1. L-Shaped and Parallel Kitchens
In an L-shape, add a visual anchor at the dead-end leg. A bold backsplash or accent wall draws the eye and gives the space character.
For parallel kitchens, streamlined kitchen cabinets on upper walls prevent that boxed-in feeling. Keep your working triangle tight so you move quickly between sink, stove, and fridge.
Check-out: L Shaped Modular Kitchen
2. U-Shaped and Peninsula Kitchens
U-shaped spaces can feel dark. Under-cabinet lighting and wrap-around shelving open up the space. Peninsulas invite social moments.
Add overhang seating where friends can chat whilst you cook. Consider contrasting base cabinet colours to break up the visual weight of three-sided cabinetry.
"U-shaped, galley or single-wall layouts are great options for tight spaces. You can have cabinets on both sides to maximise storage space or place a breakfast bench on one side." - Houzz India
Check-out: U Shaped Kitchen
3. Open-Plan and Island Kitchens
A statement island anchors these kitchen decor ideas beautifully. Choose one with hidden storage to keep sightlines clean.
Pendant light clusters hung over the island create a visual zone that marks the kitchen without walls. Flooring transitions, like a subtle shift from tile to wood, add separation while keeping the flow intact.
Check-out: Island Kitchen
How Can Storage Enhance Kitchen Decor Ideas?
Well-styled storage does two jobs at once. It clears clutter and adds personality. The trick is finding pieces that look good even when full.
Open shelves work brilliantly when styled right. Follow the rule of three: group items in odd numbers. Vary heights. Mix textures, like a ceramic bowl next to a glass jar next to a linen pouch. Use kitchen racks to display your best pieces whilst keeping everyday items within reach.
Hidden solutions matter too. Pull-out pantries and drawer organisers keep counters bare. A magnetic strip for your knife set frees up drawer space and doubles as a sleek wall feature. Glass jars with matching labels look tidy and speed up meal prep.
Quick tip: Rotate shelf displays every month. Fresh arrangements stop the look from going stale, and regular dusting becomes easier.
Which Kitchen Decor Ideas Trends?
Three palettes are gaining ground this year. Pick the one that fits your taste and work it into swappable elements first.
- Palette Name:🌾Warm Neutrals
- Key Colours: Cream, Sand, Terracotta
- Best Paired Finish: Matte wood cabinets
- Palette Name:🌿Moody Greens
- Key Colours: Forest Green, Olive, Sage
- Best Paired Finish: Brass hardware
- Palette Name:⚫Mixed Metals
- Key Colours: Charcoal, Steel Grey, Black
- Best Paired Finish: Brushed nickel and copper
Finish trends lean towards matte cabinetry, textured ceramic tiles, and sustainable composite countertops. When combining finishes, choose one dominant and one accent. A matte green cabinet with brass handles works. Three competing textures do not.
A word of caution: trends shift. Make bold choices with items that can be easily swapped. Think kitchen linen sets, hardware, or a removable backsplash panel. That way, your kitchen decoration design stays current without a costly overhaul.
"In many homes, especially urban ones, kitchens are visible from living areas. This makes choosing the right colours even more important." - Good Homes India
Also Read: 18 Cute Kitchen Items for a Brand New Look
What Lighting Choices Elevate Kitchen Decor Ideas?
Good lighting works in three layers. Ambient light fills the room. Task light targets work zones. Accent light adds visual interest. Get all three right, and your kitchen transforms.
💡 Ambient
- Fixture Examples: Flush mounts, recessed spots
- Placement Height: Ceiling level
- Lumen Range: 3,000 to 4,000
🔦 Task
- Fixture Examples: Under-cabinet strips, pendants
- Placement Height: 75 to 90 cm above the surface
- Lumen Range: 450 to 800 per zone
✨ Accent
- Fixture Examples: Toe-kick LEDs, glass cabinet lights
- Placement Height: Floor or inside cabinets
- Lumen Range: 150 to 300
Smart ceiling lights with dimmer controls let you shift from bright cooking mode to soft evening ambience in seconds. Match bulb colour temperature across all layers. A mix of warm and cool tones feels disjointed. Stick to 2,700K to 3,000K for a cosy, unified glow.
Kitchen Ideas for Decorating a Small Kitchen Without Sacrificing Style
Limited space does not mean limited style. It just means smarter choices. Vertical storage is your best friend. Ceiling-height cabinets, wall rails, and pegboards move items off counters and floors.
Optical tricks expand the feel of the room:
- Reflective backsplashes bounce light and create depth
- Continuous flooring without visual breaks makes the space feel larger
- Glass-front cabinet doors add layers without bulk
- Light colours on walls pull the eye outward
- Mirrors placed opposite windows double natural light
Multi-task furniture helps too. A fold-down breakfast bar gives you prep space and a dining spot without taking permanent floor area. A rolling cart moves from counter to table to corner as needed.
Clutter shrinks a small room fast. Stick to a one-in-one-out rule. Every new item means one old item goes. This habit keeps surfaces clear and your kitchen decoration design looking sharp.
Also Read: Organizing Your Small Kitchen with a Touch of Minimalism
What are Easy DIY Kitchen Decoration Design Projects?
Weekend projects can shift the look of your kitchen without a full renovation. Here are three achievable ideas:
- Peel-and-stick backsplash tiles
Tools: Measuring tape, utility knife, level
Time: 3 to 4 hours
Cost: Rs 1,500 to Rs 4,000
Safety tip: Cut away from your body; use a fresh blade
- Repaint cabinet doors
Tools: Sandpaper, primer, brush or mini roller, specialty cabinet paint
Time: Full weekend (drying time included)
Cost: Rs 2,000 to Rs 5,000
Safety tip: Work in a well-ventilated area; open windows or use a fan
- Upgrade drawer pulls and handles
Tools: Screwdriver, measuring tape, pencil
Time: 1 to 2 hours
Cost: Rs 800 to Rs 2,500
Safety tip: Switch off power if working near any electrical points
Clean up as you go. Wipe surfaces before paint dries. Bag old hardware for donation. A tidy end means you enjoy the result straight away.
How Do You Refresh Kitchen Decor Ideas Through the Year?
Seasonal swaps keep your kitchen feeling new without big changes. Rotate textiles by season. Bright dish towels and cotton rugs work in warmer months. Switch to richer tones and heavier weaves when the air turns cool.
Spring calls for fresh herb planters on the windowsill. Summer suits lighter linens and open shelves stocked with colourful ceramics. Autumn invites warmer lighting and candle displays. Winter welcomes cosy touches like a knitted tea cosy or spiced scent diffusers.
Did you know? A three-item limit per surface prevents clutter creep. Display one vase, one small plant, and one functional piece. Swap them out when the season shifts.
Personal touches ground the space. Travel finds, inherited pottery, or framed artwork from the children add meaning. These small, intentional changes stop decor fatigue and keep your kitchen feeling current all year.
Ready to Bring These Kitchen Decor Ideas to Life?
The core idea is simple. Kitchen decor ideas that work combine visual appeal with practical workflow. Every kitchen, no matter the size or budget, can find that balance. It starts with a clear vision, layout-aware choices, and smart storage that looks as good as it functions.
Pick one change to tackle this week. Rearrange your open shelves. Test a colour swatch against your cabinets. Start that peel-and-stick backsplash you have been eyeing.
Small steps add up. Your kitchen decoration design will grow stronger with each one. Go ahead and experiment. These strategies back both style and daily function.
Frequently Asked Questions (FAQs)
1. What is the cheapest way to update kitchen decor without renovating?
Swap out hardware, add a peel and stick backsplash, or refresh textiles like dish towels and rugs. These changes cost little and shift the look fast.
2. Which colours work best for small or dark kitchens in 2026?
Light neutrals like cream and soft grey reflect light and open up tight spaces. Warm terracotta accents add depth without closing the room in.
3. How do you mix metal finishes in a kitchen without clashing?
Choose one dominant metal for large fixtures and one accent metal for smaller details. Keep the ratio around seventy thirty for a balanced look.
4. What are quick kitchen decor ideas suitable for renters?
Use removable wallpaper or peel and stick tiles. Add portable storage like rolling carts. Swap light shades if the landlord allows. Focus on items you can take with you.
5. How often should you refresh kitchen textiles and seasonal accents?
A seasonal swap works well. Update dish towels, rugs, and small displays every three to four months to keep the space feeling fresh.
6. Can open shelving work in a functional kitchen, or does it just collect dust?
Open shelves work when styled with intention and maintained regularly. Rotate items monthly. Keep daily use pieces at the front and wipe down once a week.
29 Jul 2026
Bonhomie
 FurnitureSofas, Sectional Sofas, Sofa Cum Beds, Chaise Loungers, Bean Bags, Recliners, Sofa Chairs, Settees & Benches, Ottomans, Chairs, Gaming Chairs, Stools & Pouffes, Shoe Racks, Centre Tables, Side Tables, TV & Media Units, Cabinets & Sideboards, Book Shelves, Book Cases, Dining Sets, Dining Chairs, Dining Tables, Crockery Units, Bar Furniture, Beds, Bedside Tables, Trunks, Chest of Drawers, Dressing Tables, Screens and Dividers, Wardrobes, Kids and Teens, Study Tables, Office Furniture, Home Temples, Wall Shelves and Cabinets, Outdoor, Massagers, Furniture Care
- Sofas
- Sectional Sofas
- Sofa Cum Beds
- Chaise Loungers
- Bean Bags
- Recliners
- Sofa Chairs
- Settees & Benches
- Ottomans
- Chairs
- Gaming Chairs
- Stools & Pouffes
- Shoe Racks
- Centre Tables
- Side Tables
- TV & Media Units
- Cabinets & Sideboards
- Book Shelves
- Book Cases
- Dining Sets
- Dining Chairs
- Dining Tables
- Crockery Units
- Bar Furniture
- Beds
- Bedside Tables
- Trunks
- Chest of Drawers
- Dressing Tables
- Screens and Dividers
- Wardrobes
- Kids and Teens
- Study Tables
- Office Furniture
- Home Temples
- Wall Shelves and Cabinets
- Outdoor
- Massagers
- Furniture Care
 Sofas & SeatingSofas, Sofa Sets, Sectional Sofas, Sofa Cum Beds, Recliners, Recliner Sets, Chaise Loungers, Sofa Chairs, Bean Bags, Accent Chairs, Office Chairs, Gaming Chairs, Dining Chairs, Bar Seating, Settees & Benches, Ottomans, Stools & Pouffes, Outdoor Seating, Furniture Care, Top Collections, Top Brands
- Sofas
- Sofa Sets
- Sectional Sofas
- Sofa Cum Beds
- Recliners
- Recliner Sets
- Chaise Loungers
- Sofa Chairs
- Bean Bags
- Accent Chairs
- Office Chairs
- Gaming Chairs
- Dining Chairs
- Bar Seating
- Settees & Benches
- Ottomans
- Stools & Pouffes
- Outdoor Seating
- Furniture Care
- Top Collections
- Top Brands
 MattressesKing Size Mattresses, Queen Size Mattresses, Single Size Mattresses, Foldable Mattresses, Crib Mattresses, Mattress Protectors, Mattress Toppers, Pillows, Mattresses By Feature, Top Brands
- King Size Mattresses
- Queen Size Mattresses
- Single Size Mattresses
- Foldable Mattresses
- Crib Mattresses
- Mattress Protectors
- Mattress Toppers
- Pillows
- Mattresses By Feature
- Top Brands
 Home DecorVases, Figurines, Collectibles, Showpieces, Home Utility, Table Decor, Kids Decor, Photo Frames, Candles, Candle Stands, Decor Gift Sets, Spiritual, Home Fragrances, Appliances, Prayer Essentials, Artificial Plants & Flowers, Festive Decor, Gardening, Pots and Planters, Outdoor Decor, Wall Hangings, Wall Shelves, Wall Cabinets, Set Top Box Holders, Key Holders, Jharokhas, Screens & Dividers, Wall Decor, Wall Art and Paintings, Wallpapers & Decals, Clocks, Mirrors, Gifting
- Vases
- Figurines
- Collectibles
- Showpieces
- Home Utility
- Table Decor
- Kids Decor
- Photo Frames
- Candles
- Candle Stands
- Decor Gift Sets
- Spiritual
- Home Fragrances
- Appliances
- Prayer Essentials
- Artificial Plants & Flowers
- Festive Decor
- Gardening
- Pots and Planters
- Outdoor Decor
- Wall Hangings
- Wall Shelves
- Wall Cabinets
- Set Top Box Holders
- Key Holders
- Jharokhas
- Screens & Dividers
- Wall Decor
- Wall Art and Paintings
- Wallpapers & Decals
- Clocks
- Mirrors
- Gifting
 FurnishingsBed Sheets, Blankets & Quilts, Bath Linen, Bed Linen, Curtains, Curtain Accessories, Laundry Baskets, Mosquito Nets, Furnishing Gift Sets, Cushions & Covers, Sofa Covers & Throws, Chair Covers & Pads, Carpets, Dhurries, Runners, Door Mats, Bath Mats, Picnic Mats, Kids Furnishings, Pet Furnishings, Yoga Mats, Top Brands
- Bed Sheets
- Blankets & Quilts
- Bath Linen
- Bed Linen
- Curtains
- Curtain Accessories
- Laundry Baskets
- Mosquito Nets
- Furnishing Gift Sets
- Cushions & Covers
- Sofa Covers & Throws
- Chair Covers & Pads
- Carpets
- Dhurries
- Runners
- Door Mats
- Bath Mats
- Picnic Mats
- Kids Furnishings
- Bed Sheets
- Carpets & Mats
- Kids Blankets and Comforters
- Pillows and Covers
- Cushion Covers
- Towels
- Bedding Sets
- Curtains
- Baby Mats
- Pet Furnishings
- Yoga Mats
- Top Brands
 Lamps & LightingFloor Lamps, Shelf Floor Lamps, Table Lamps, Night Lamps, Work and Study Lamps, Lamp Shades, Kids Lamps, Ceiling Lights, Wall Lights, Smart Lights, Outdoor Lights, Decorative Lights, Emergency Lights, Bulbs, Top Brands
- Floor Lamps
- Shelf Floor Lamps
- Table Lamps
- Night Lamps
- Work and Study Lamps
- Lamp Shades
- Kids Lamps
- Ceiling Lights
- Wall Lights
- Smart Lights
- Outdoor Lights
- Decorative Lights
- Emergency Lights
- Bulbs
- Top Brands
 Kitchen & DiningServeware, Jugs, Bakeware, Dinnerware, Cookware, Cooking Tools, Drinkware, Bottles, Flasks, Sippers, Barware, Teaware, Knives & Cutlery, Table Essentials, Jars and Containers, Kitchen Organizers, Lunch Boxes, Kids Kitchenware & Tableware, Gift Sets, Kitchen Linen, Table Linen, Kitchen Appliances, Top Brands
- Serveware
- Serving Bowls
- Casseroles
- Butter Dishes
- Serving Trays
- Tray Sets
- Appetizer Platters
- Cheese Boards
- Cake Stands
- Cloche
- Jugs
- Bakeware
- Dinnerware
- Cookware
- Cooking Tools
- Spatulas, Ladles and Tongs
- Knives and Choppers
- Chopping Boards
- Rolling Pins and Boards
- Strainers and Whisks
- Cooking Preparation Tools
- Drinkware
- Bottles
- Flasks
- Sippers
- Barware
- Barware Sets
- Bar Tools
- Ash Trays
- Wine Holders & Coolers
- Carafes and Decanters
- Dispensers
- Ice Buckets & Moulds
- Teaware
- Knives & Cutlery
- Table Essentials
- Jars and Containers
- Kitchen Organizers
- Lunch Boxes
- Kids Kitchenware & Tableware
- Gift Sets
- Kitchen Linen
- Table Linen
- Kitchen Appliances
- Top Brands
 LuxuryLiving Room, Bedroom, Dining Room, Home Office
 Modular